Microsoft is releasing its final version of its Windows 10 update in public, dubbed as Windows 10 May 2020 Update (20H1). It’s a preview build, which means update won’t roll out automatically to all machines running Windows 10 until next month, however, the Windows 10 testers can get it by opting into the Release Preview ring.
Much like the previous November 2019 Update, this (new) update is relatively small and includes improvements to Cortana and Windows search. Meaning? This update should officially launch soon for all Windows 10 users.
What Is Windows 10 May Update (20H1)?
Microsoft releases an update (twice a year) to its latest Windows operating system, which in this case is Windows 10. These are significant updates and are separate from the monthly security updates that Microsoft rolls out. So, the latest version is the Windows 10 May 2020 Update, and it’s rolling out a few weeks early to the Insiders program testers.
What’s New In Windows 10 May 2020 (20H1) Update?
Well, there are many new features that Microsoft has brought into Windows 10 through the 20H1 update. We have covered the nifty ones (below), but if you want to know everything Microsoft has released, check here.
Improved Cortana
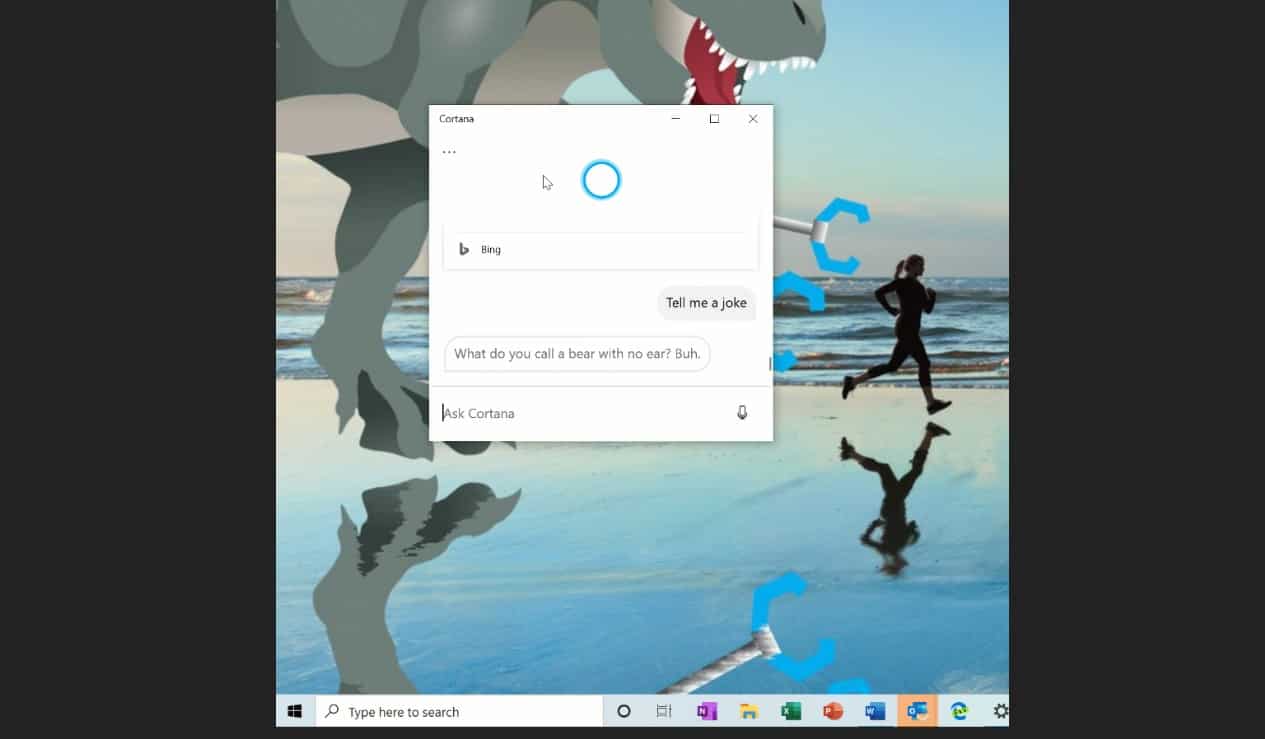
Microsoft has added a chat-based interface for Cortana, Which means, you can now type your queries to Cortana instead of voice commanding it aloud. So, when you open Cortana from the taskbar, your history of conversation will appear in a chat window that you can resize and move it around your desktop. Yes, it supports both light and dark themes to get along with Windows 10.
Cloud Download For Reinstallations
The latest Windows 10 update brings a new “Cloud Download” option that you can use when resetting your PC to a default Windows system.
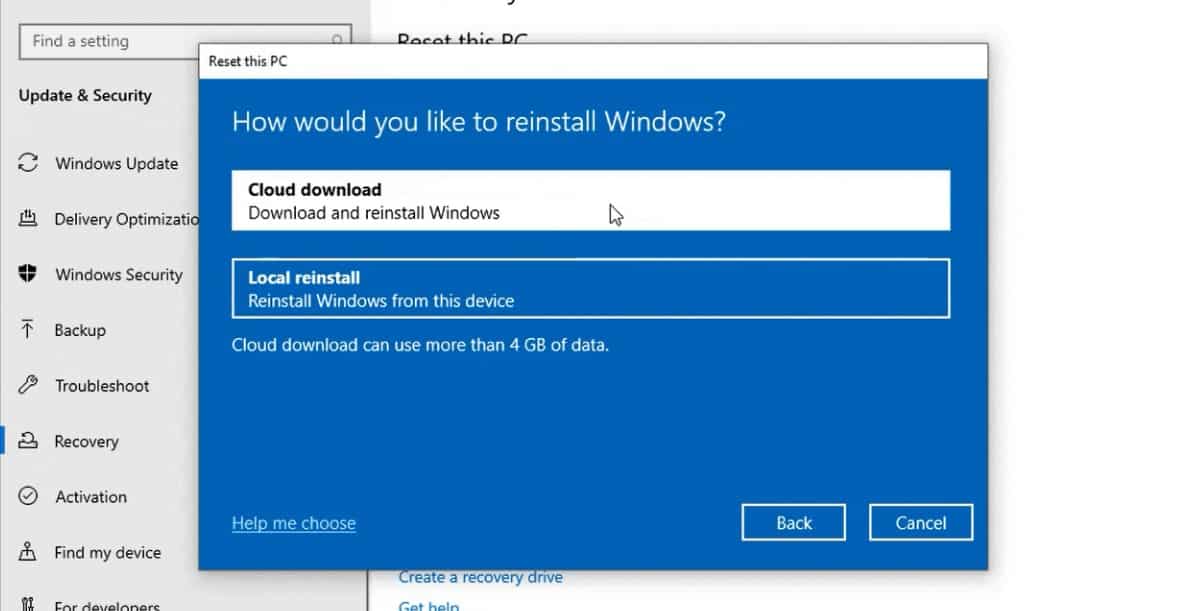
Go to Settings > Update and Security > Recovery and choose to reset your PC and remove everything, and then tell Windows to use “Cloud Download.” Instead of reinstalling Windows 10 from the files on your local system, Windows will download the latest version of Windows 10 and install it on your system.
Faster Windows Search
Windows Search had excessive disk and CPU usage, which in turn affected the general performance of the desktop, which is why many Insider was turning it off. Well, Microsoft has acknowledged the issue, and with the Windows 10 20H1 update, the company fixes Start menu search by taking advantage of the older Windows search indexer.
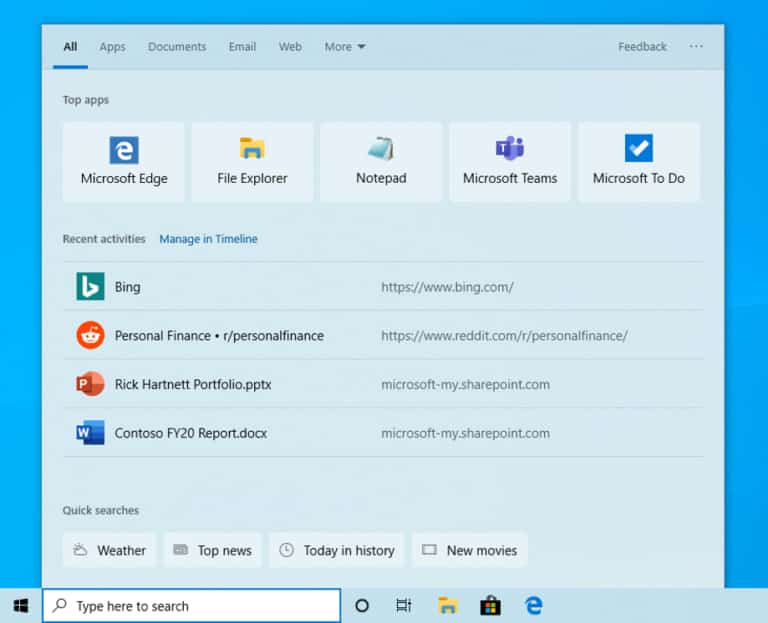
Microsoft says it’s now detecting peak usage times so it can better optimize when the indexer runs. The result is that the search is now faster by default. The company has also added four quick web searches to the Search Home;
- Weather: Get current conditions and the upcoming forecast
- Top news: Read the latest headlines from popular news sites
- Today in history: Explore four events that happened on this day
- New movies: Find out what’s playing in theaters near you
It’s a server-side change that’s currently rolling out and will appear for users across builds from version 1809 to 20H1. Now, quick searches are only available in the US, but the company said that it would be available soon internationally.
ALSO READ: Fix 100% Disk Usage Issue And Improve Windows 10’s Performance
Disk Type And GPU Temp Come To Task Manager
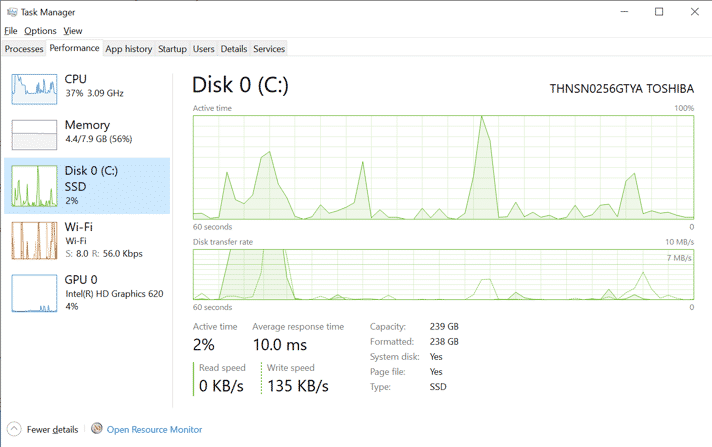
Windows 10’s Task Manager now displays your disk type, whether it is SSD or HDD, making it easier to see the hardware in your computer. To check the details, open the Task Manager (Ctrl+Shift+Esc) and then click “More Details.”
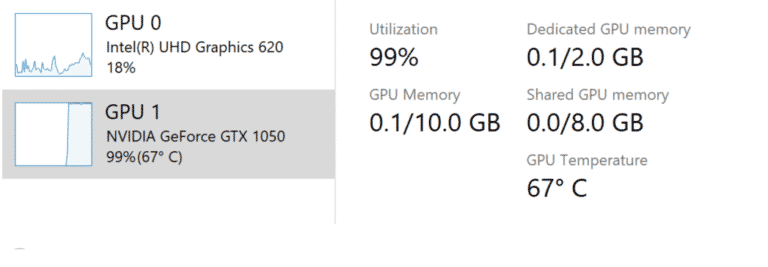
The Windows Task Manager will also display your GPU temperate in GPU’s status page under the Performance tab. It also works with dedicated graphics cards; however, it doesn’t work with integrated or onboard GPUs.
More Kaomoji
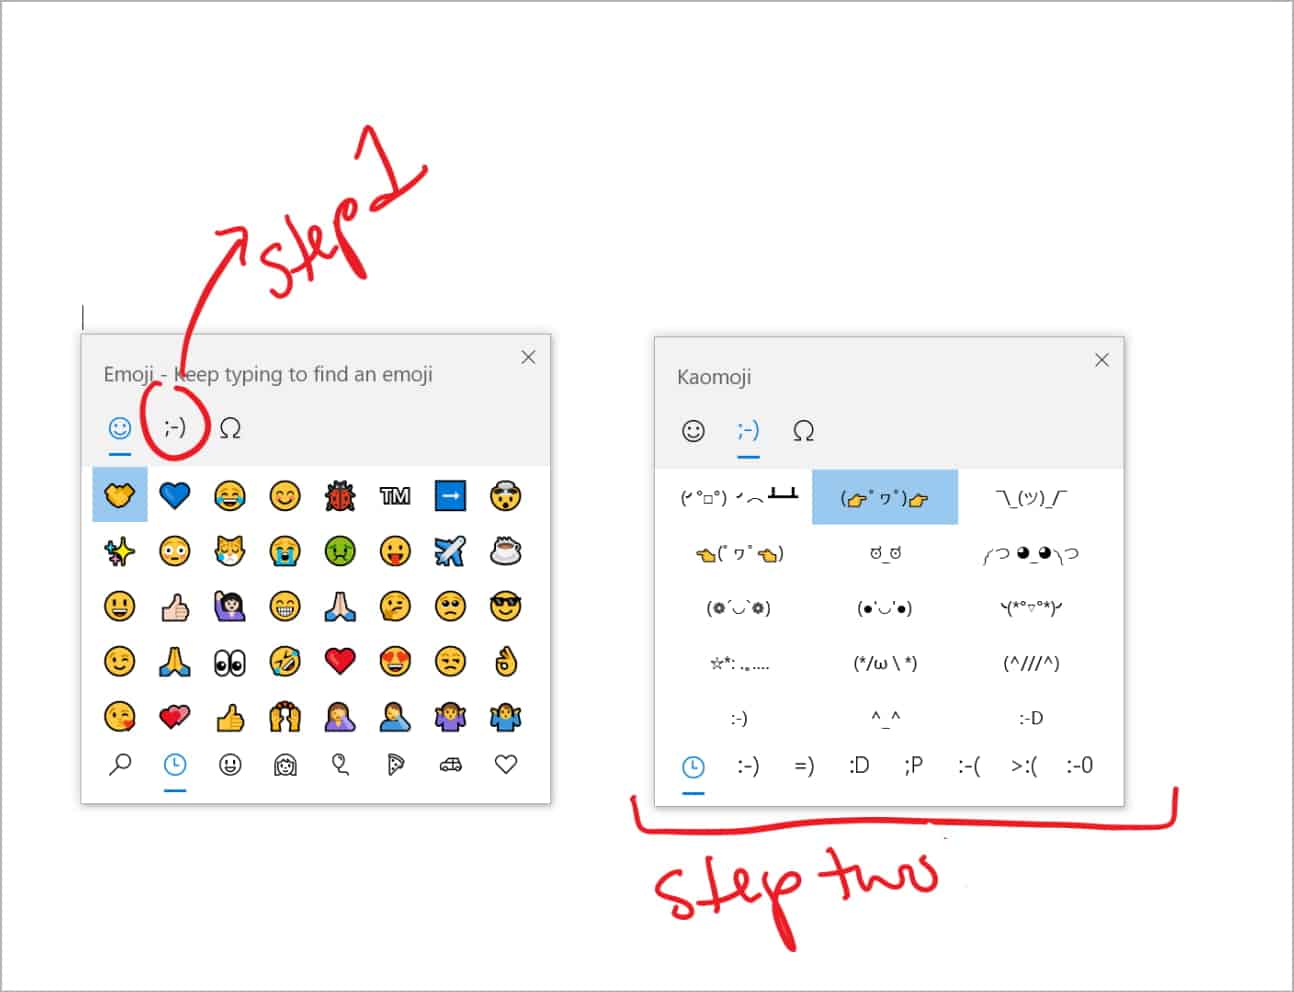
Microsoft has updated its WIN+(Period) / WIN+(Semicolon) keyboard shortcut to not only include emoji but also now to contain kaomoji and special characters. What are kaomoji? They’re faces with expressions you can make by combining various characters, like for this one ¯\_(ツ)_/¯.
Disable Restarting Apps At Sign-In
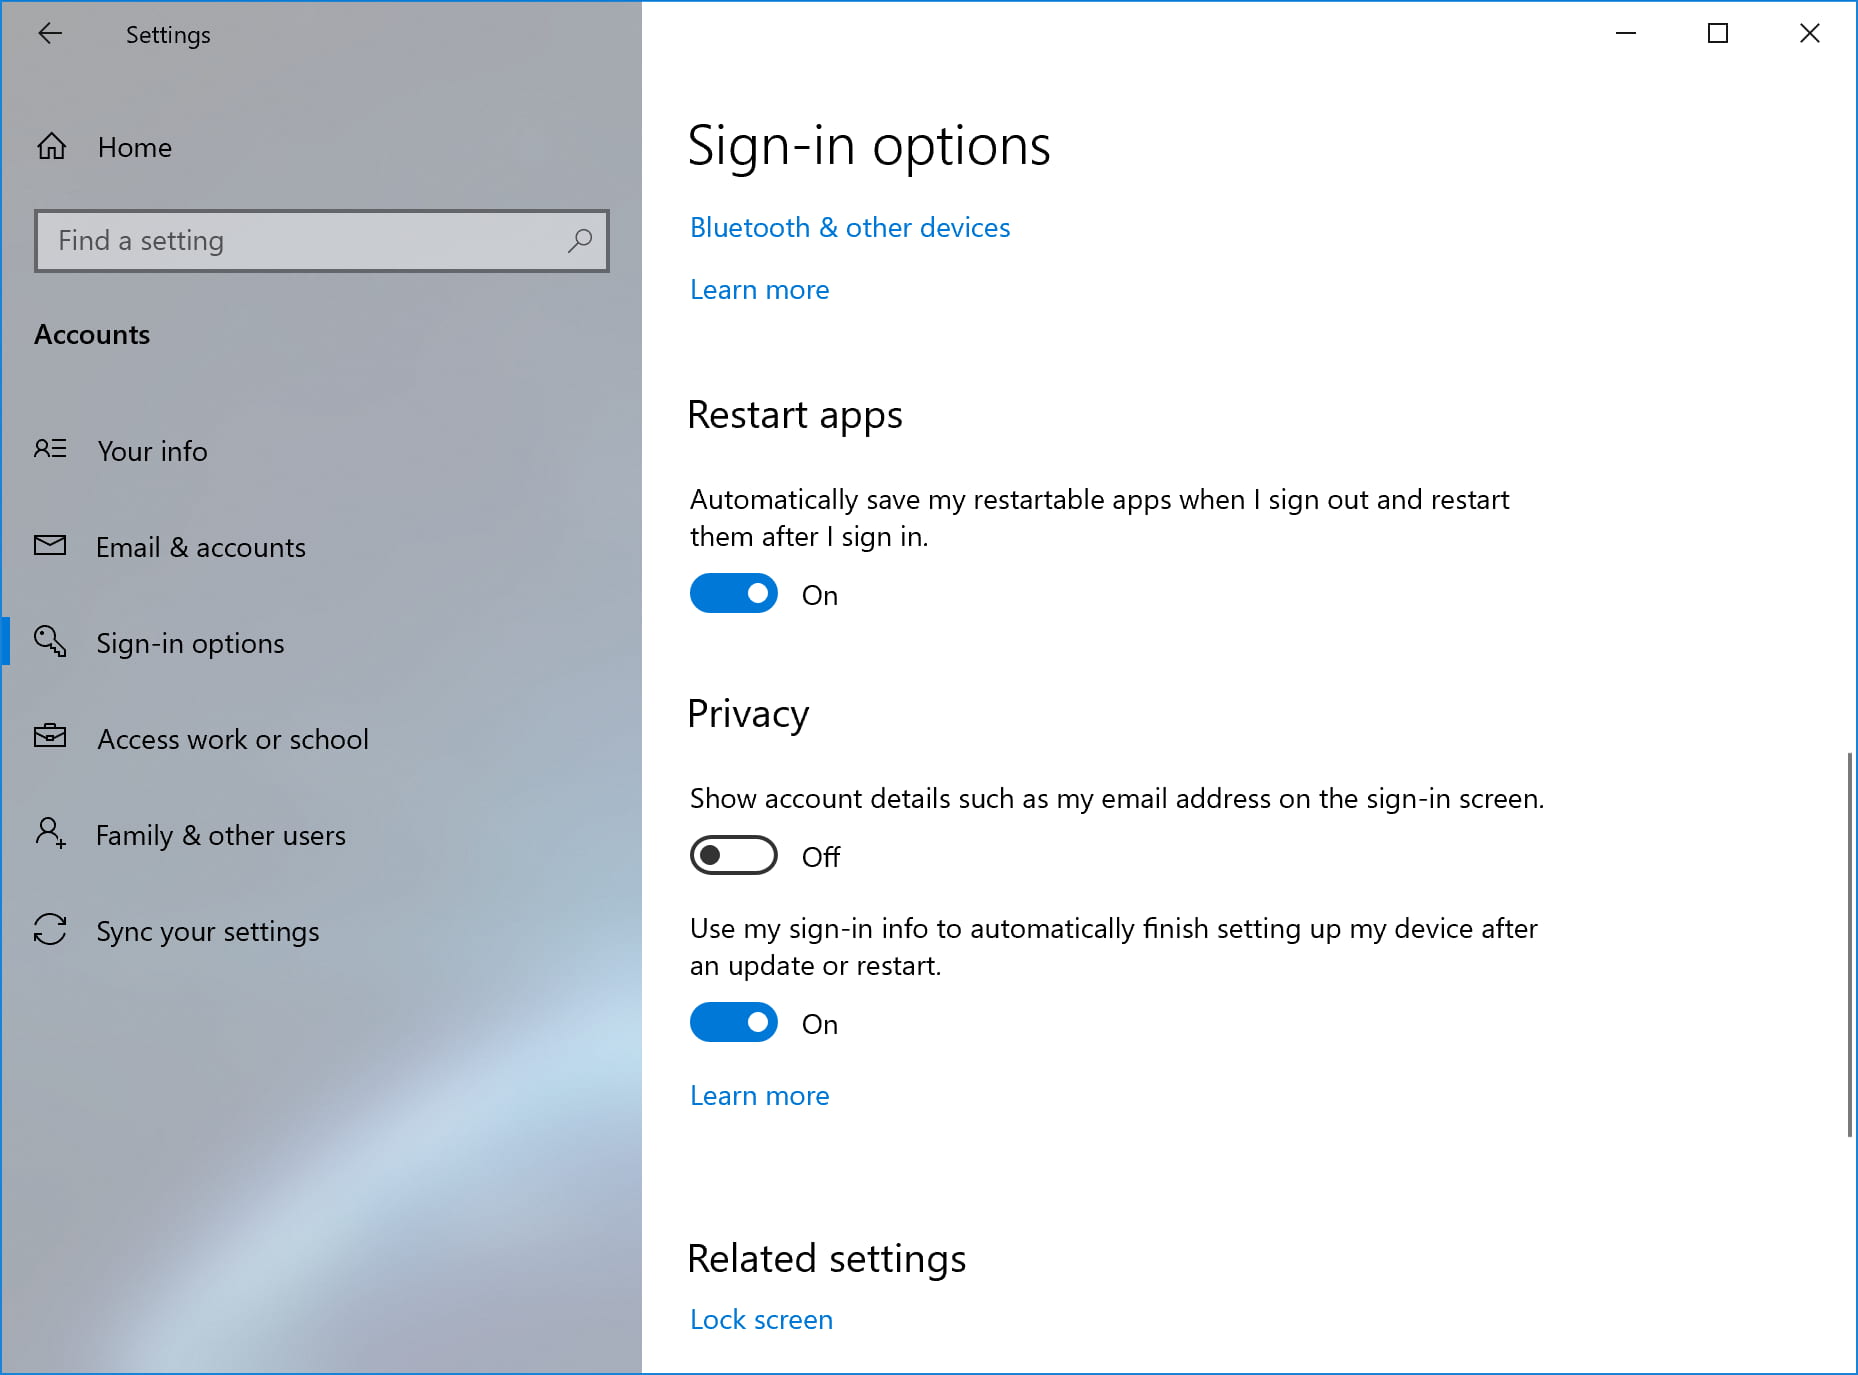
Windows 10 auto-reopens many applications, like Google Chrome, after you restart your PC. Well, you can now disable this option. Head over your system Settings > Accounts > Sign-in options. Under Restart apps, toggle off “Automatically save my restartable apps when I sign out and restart them.”
ALSO READ: Top 10 Windows 10 Tips And Tricks You Wish You Knew Before [2020]
Go Passwordless On Your Device
There is a new “Make your device passwordless” option on the Settings > Accounts > Sign-in page. It basically abolished passwords and requires everyone on your PC to sign in with a PIN or a Windows Hello biometric sign-in method like face or fingerprint unlock.
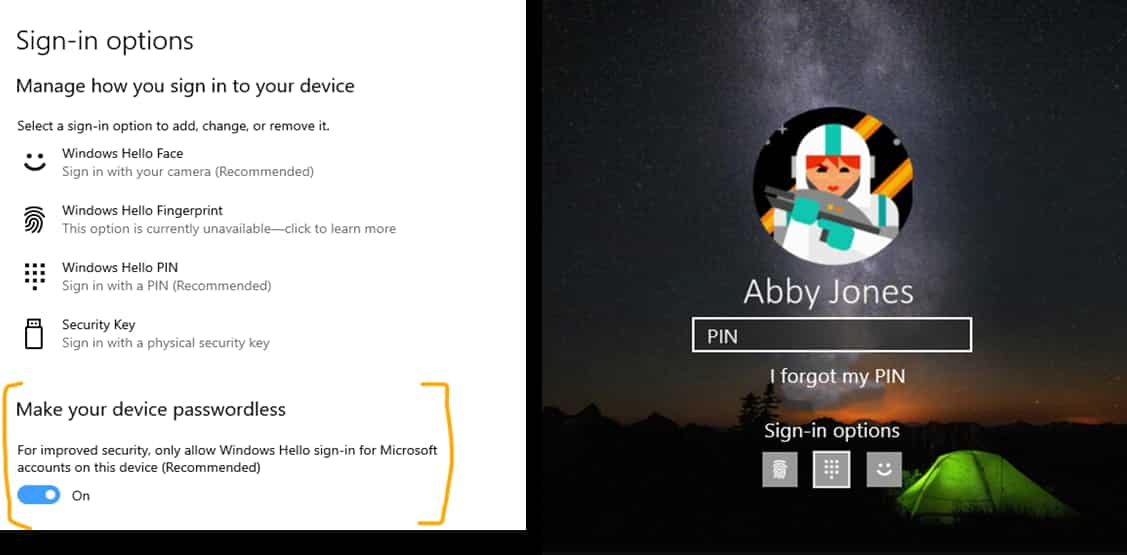
This feature will strengthen your device sign-in by switching all Microsoft accounts on your device to modern multifactor authentication with Windows Hello Face, Fingerprint, or PIN, and eliminating passwords from Windows.
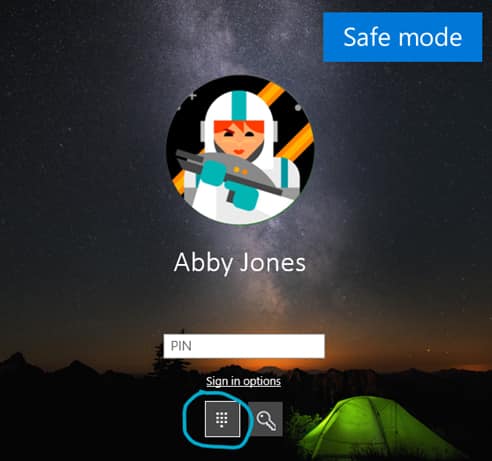
Furthering the Passwordless journey, Microsoft has added Windows Hello sign-in support to Safe mode, which means you no longer have relied on your password when troubleshooting your device. Here’s how to enable it;
- Set up Windows Hello in Settings > Accounts > Sign-in options
- Boot your device into Safe mode:
- Go to Settings > Update and Security > Recovery.
- Under Advanced startup, select Restart now.
- After your PC restarts to the Choose an option screen, select Troubleshoot > Advanced options > Startup Settings > Restart. You may be asked to enter your BitLocker recovery key.
- After your PC restarts, you’ll see a list of options. Select 4 or press F4 to start your PC in Safe Mode. You can also select 5 or press F5 to use Safe Mode with Networking.
- Sign in to your device with your Windows Hello PIN
Renaming Virtual Desktops
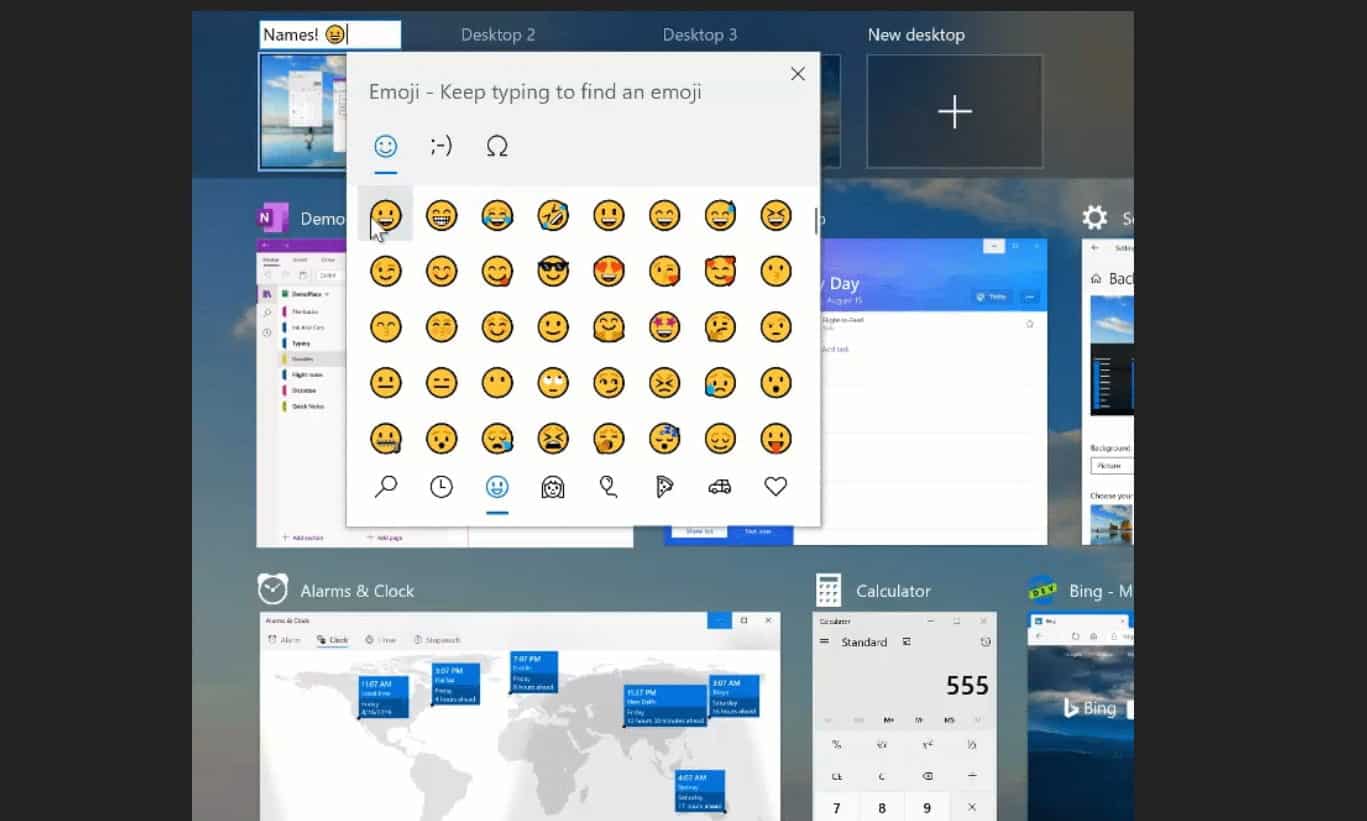
Windows 10’s virtual desktops are available in the Task View interface when you press Windows+Tab on your keyboard (or click the Task View icon on the taskbar). Now, rather than default names provided by Windows, like “Desktop 1″ and “Desktop 2,” you can rename them.
Just click the name of each virtual desktop at the top of the Task View interface and then type a name. You can even use emoji (press Windows+. to get emoji picker).
Improved Network Status Pane
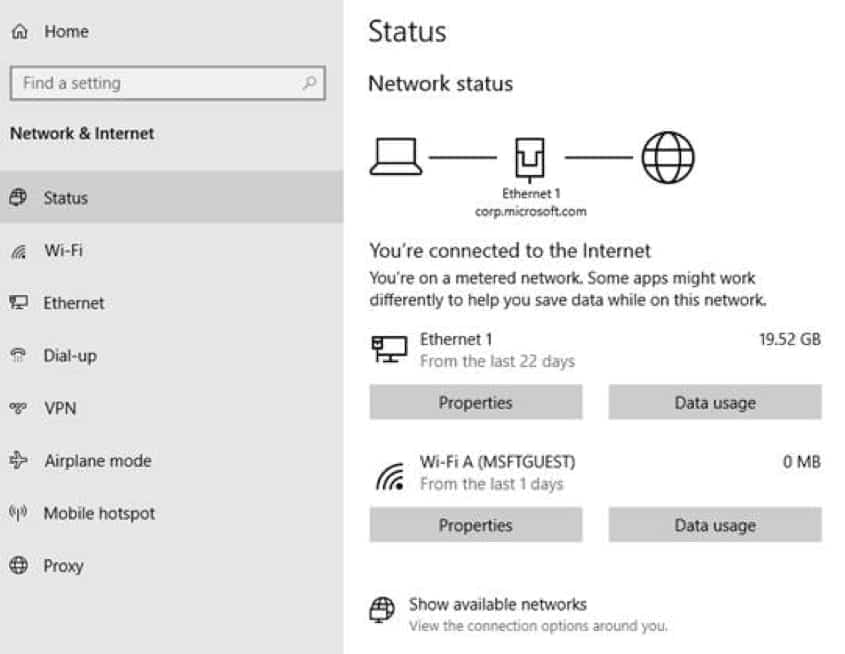
The update has revamped the Network status page. Go to Settings > Network & Internet > Status has been redesigned. It now shows all the network at the top of the page. According to Microsoft, this new interface should “provide more information at a glance about your device’s connectivity.”
Support For Network Cameras
Windows 10 is adding support for IP-based cameras. Now, you’ll be able to add network-based cameras by going to Settings > Devices > Bluetooth and other devices > Add Bluetooth or other devices. If there’s a supported camera on your local network, Windows 10 will find it, or you can add it to your system in one click. Then, you can use the built-in Camera app to access the network camera.
FPS Counter In The Xbox Game Bar

Windows 10’s new game bar now has an FPS counter and achievement overlay. Just set focus to your favorite game, press WIN + G to open the Game Bar while playing a game, and you’ll see a real-time FPS counter.
ALSO READ: How To Keep A Windows Laptop Awake With The Lid Closed [Quick Guide]
How To Get The Windows 10 May 2020 Update (20H1)
As mentioned above, this new update is only coming to Windows Insiders in the Release Preview ring, until the official release for all Windows 10 users. Well, here’s how you can get the preview version on your PC right now;
Become A Windows Insider
You need to be a Windows Insider to access the preview build of Windows 10 May 2020 Update. It’s free to join the beta-testing program; however, you will be dealt with bugs, which could affect your overall workflow. So, we would recommend you to use your secondary computer (if you have) for this.
To become Windows Insider, go to Microsoft’s Windows Insider website, sign in to your Microsoft account, and click Get Started to become a Windows Insider. Once your PC is on the May 2020 Update, Microsoft will continue to release “cumulative updates” like usual.
- Go to Settings > Update and Security > Windows Insider Program > click the “Get started” button.
- Link your Microsoft account. This is the email account you used to register for the Windows Insider Program.
- Choose “Just fixes, apps, and drivers” to join the Release Preview ring and get the May 2020 Update and confirm.
- Press “Restart Now.” Yes, a restart is required.
- After rebooting your PC, you check your Windows Insider Program settings. Go to Settings > Update and Security > Windows Insider Program and double-check that it shows “Release Preview” under “What pace do you want to get new builds?”.
- If you go to Settings > Update and Security > Windows Update and press the “Check for updates” button, your PC will receive the update.
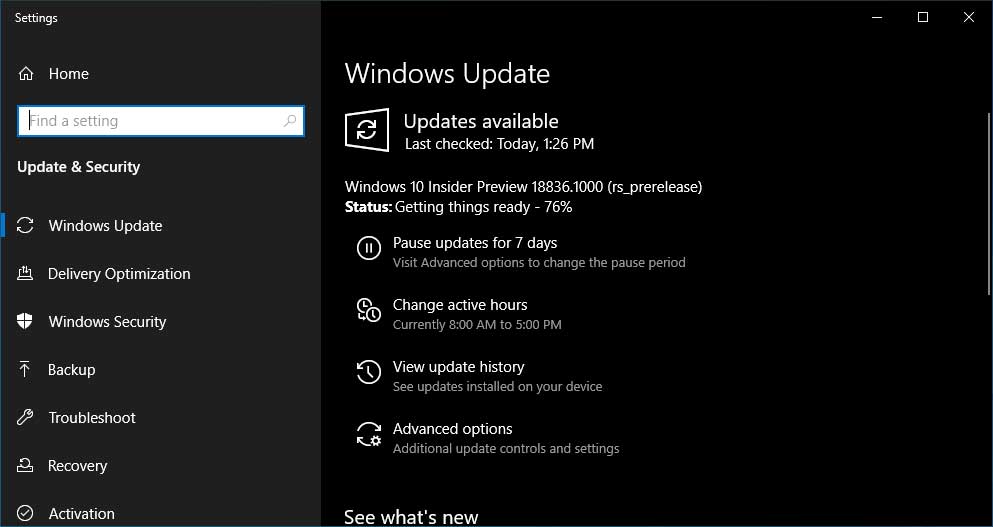
Check For The Update
When the update officially rolls out worldwide, any Windows 10 user can simply go to Windows Update to check for the update.
- Go to Settings > Update and Security > Windows Update, and click Check For Updates.
- If your system is eligible to update, it should begin downloading and installing.
If you want to know more about Windows 10 May 2020 Update, check out Microsoft’s blog post for more details.
