We all have faced and have overcome email regrets. That moment when you select “reply all” and hit Send, disaster knocks your door. Well, things are slightly different if you are using Gmail. Thanks to its “Undo Send” feature, which recalls a mistakenly sent cringe-worthy message.
ALSO READ: These Are 7 Upcoming Foldable Smartphones To Look Forward In 2019
How To Undo Send An Email On Gmail
This feature was bought into Gmail Labs years ago, which later became an official opt-in Gmail feature in 2015. Well, now with the launch of new Gmail last year, the Undo Send is now turned on by default and the best part is that you can adjust how long you have to unsend an email.

On The Desktop;
- Log into Gmail
- Click the Gear icon on the up-right corner, select Settings
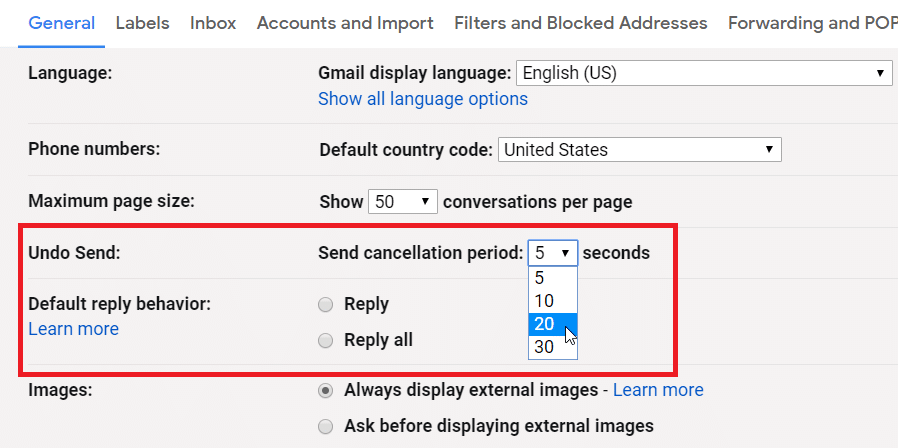
- Under the General tab, scroll down to Undo Send
- Click the drop-down menu
- Select whether you want to “Undo Send” option to appear for 5, 10, 20, or 30 seconds after you hit send
- After selecting the time frame, scroll to the bottom
- Click Save Changes

After this is done, next time around, when you send an email, an Undo button will appear on the bottom left corner, and if you click it, the email (which you mistakenly send or need correction) will return as a draft for you to correct or discard it.
ALSO READ: 7 Hidden Facebook Messenger Tricks You Probably Didn’t Know About
In The Smartphone (App);
There’s nothing you need to do in the app, once the feature is set up on the desktop, the Undo Send settings will apply to the Gmail mobile app (iOS and Android).

Much like the desktop, when you hit send, an Undo link will appear at the bottom of the screen and will remain there for the time frame you selected and if you click on it, it will return to your draft.
Extra Cautious? Here’s One More Barrier!
The introduction of Undo Send feature on Android app (not on iOS) is quite recent. Prior to this feature, the best way was to enable “Confirm before sending”, which prompts asking if you really want to send an email before it is sent.

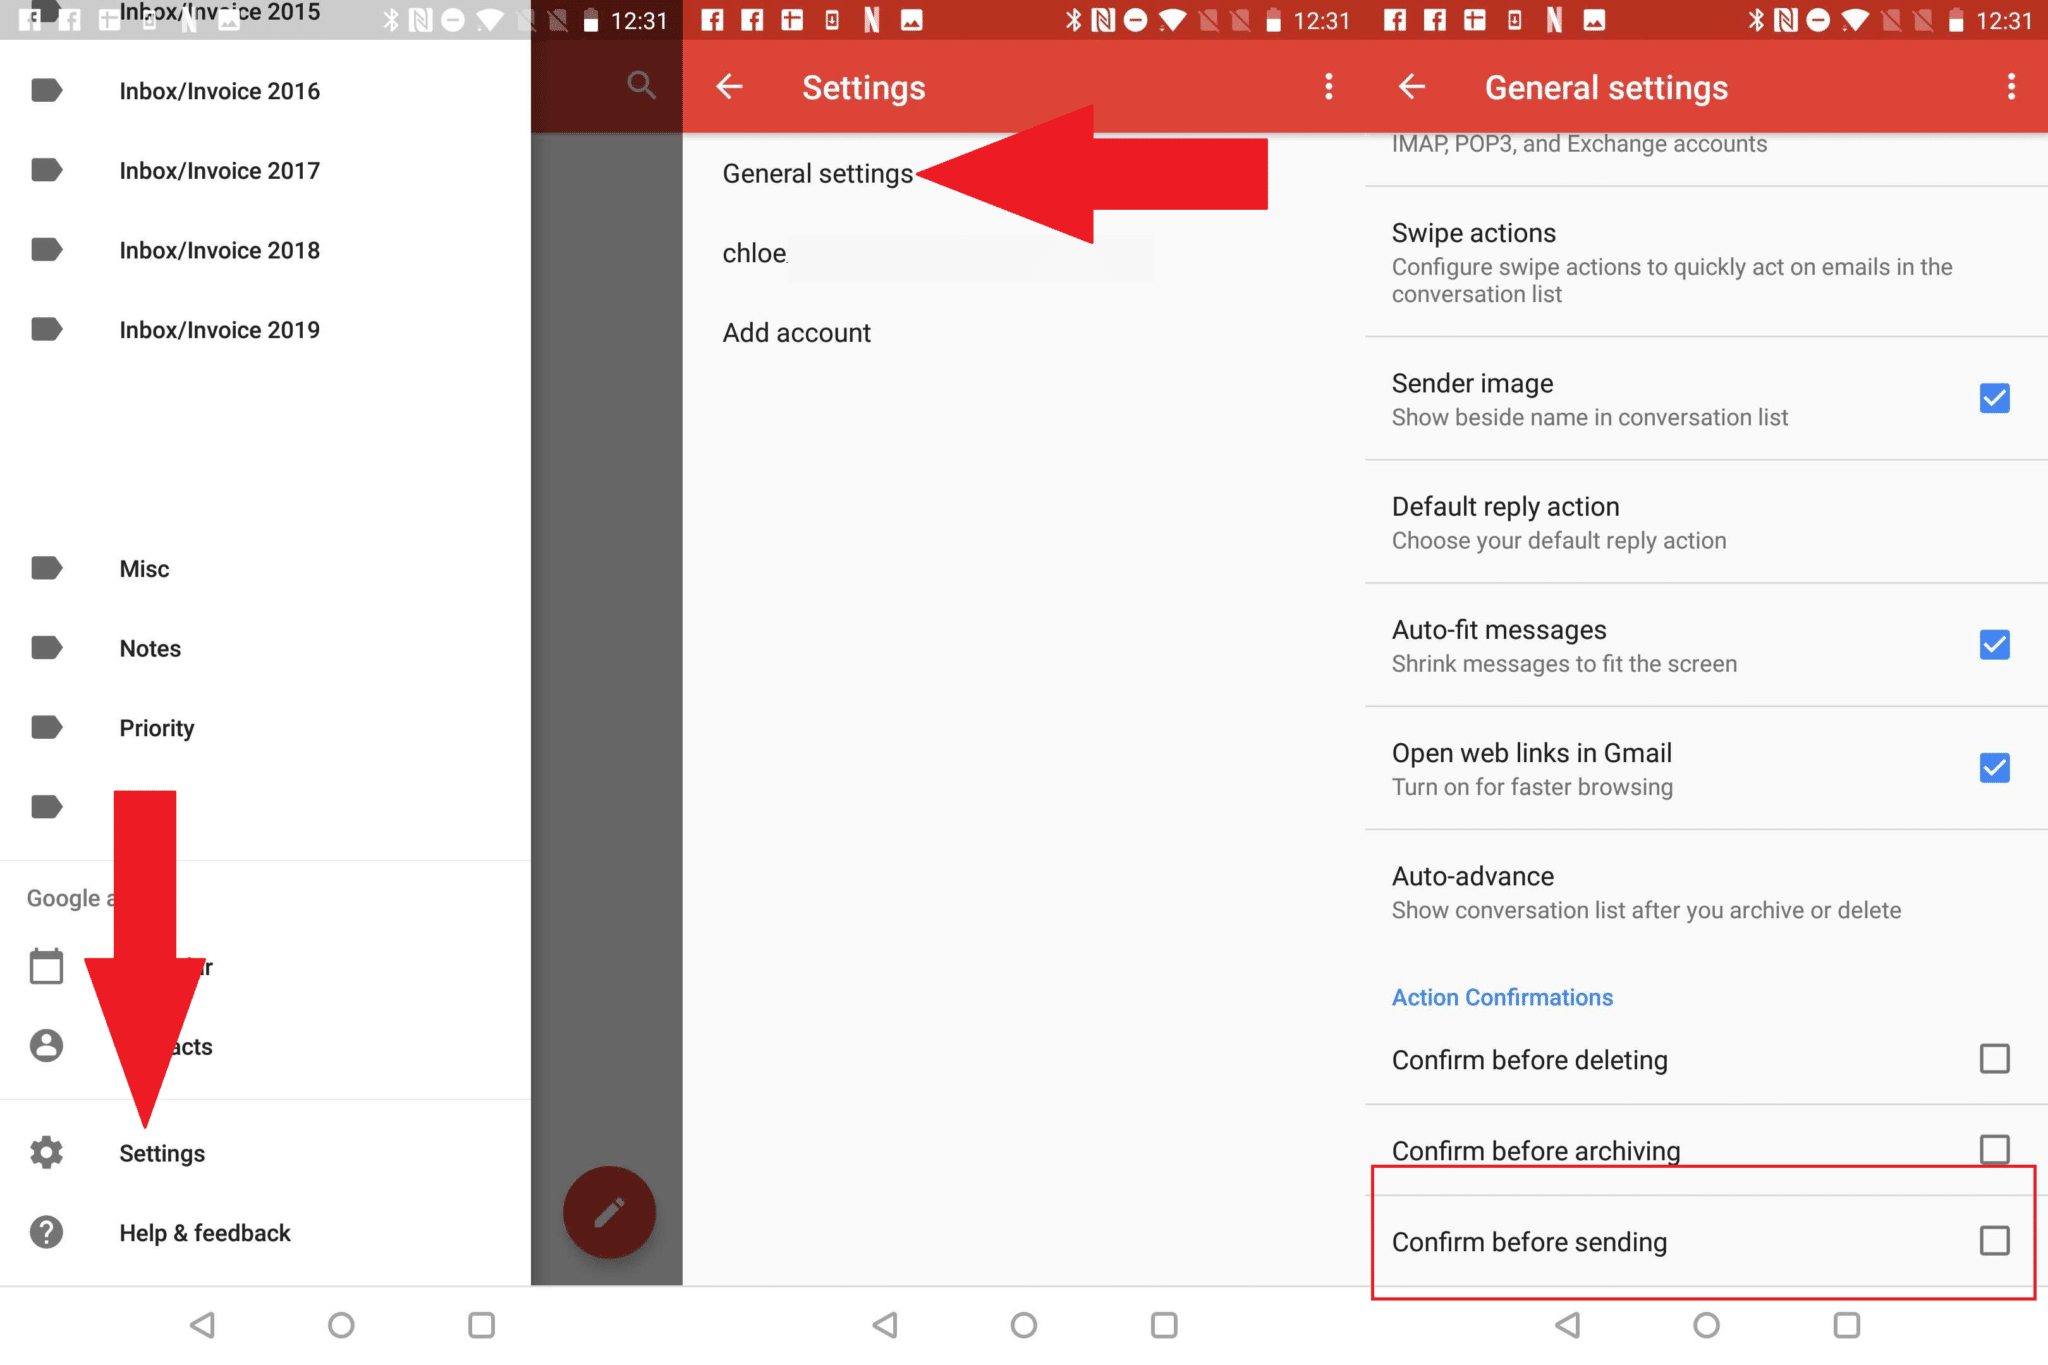
The feature is still available on the app, so, if you want a double check, you can enable this feature too. Here’s how to do it;
- Click on the hamburger icon
- Scroll to the bottom of the left pane, tap Settings
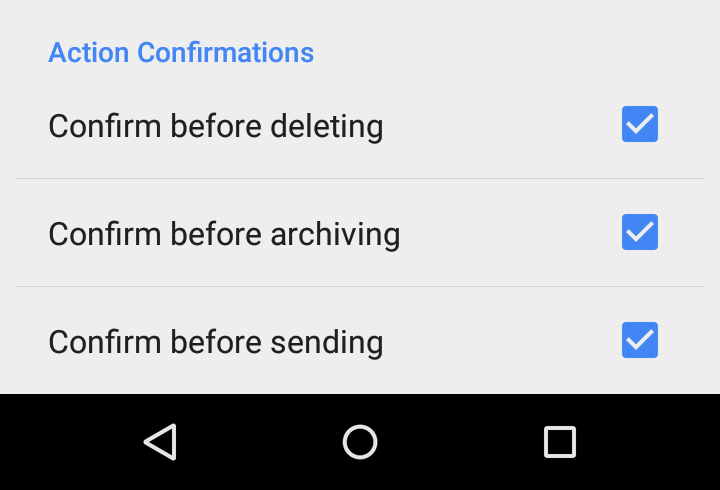
- Tap on the checkmark next to “Confirm before sending”
- That’s it!
BONUS VIDEO
For the latest tech news, follow TechDipper on Twitter, Facebook, Google+, Instagram and subscribe to our YouTube channel.


