If you have accidentally deleted a file, you still have hope. Assuming that you cannot drag it back out of the Windows Recycle Bin, there’s a way to recover it. There are many File-restoration apps that have been around for a long time, but we are going to recover the deleted files using Microsoft’s new Windows File Recovery.
Last week, Microsoft released a new (Windows only) utility called Windows File Recovery for Windows 10 version 2004 or newer and it’s free to download from the Microsoft Store right now. That said, here’s how to recover deleted files using Windows File Recovery.
???? JOIN OUR TELEGRAM COMMUNITY
Microsoft’s Windows File Recovery
Windows File Recovery doesn’t come with a pretty-GUI app, instead, you get a Command Prompt. There are three different file-recovery modes built into Microsoft’s tool for varied purposes of recovering the lost files;
Default Mode
This mode uses the Master File Table (MFT) to locate lost files. Default mode works well when the MFT and file segments, also called File Record Segments (FRS), are present.
1. To recover a specific file from your C: drive to the recovery folder on a D: drive.
winfr C: D: /n \Users\<username>\Documents\put_the_filename.docx
2. Recover jpeg and png photos from your Pictures folder to the recovery folder on a D: drive.
winfr C: D: /n \Users\<username>\Pictures\*.JPEG /n \Users\<username>\Pictures\*.PNG
3. Recover your Documents folder from your C: drive to the recovery folder on a D: drive.
winfr C: D: /n \Users\<username>\Documents\
Note: Don’t forget the backslash (\) at the end of the folder.
Segment Mode
This mode does not require the MFT but does require segments. Segments are summaries of file information that NTFS stores in the MFT such as name, date, size, type, and the cluster/allocation unit index.
1. Recover PDF and Word files from your C: drive to the recovery folder on a D: drive.
winfr C: D: /r /n *.pdf /n *.docx
2. Recover any file with the string “script” in the filename by using wildcard characters.
winfr C: D: /r /n *script*
Signature Mode
This mode only requires that the data is present and searches for specific file types. It doesn’t work for small files. To recover a file on an external storage device, such as a USB drive, you can only use Signature mode.1. When using the signature mode, it’s helpful to first see the supported extension groups and corresponding file types.
winfr /#
2. Recover JPEG (jpg, jpeg, jpe, jif, jfif, jfi) and PNG photos from your C: drive to the recovery folder on a D: drive.
winfr C: D: /x /y:JPEG,PNG
3. Recover ZIP files (zip, docx, xlsx, ptpx, and so on) from your C: drive to the recovery folder on a D: drive.
winfr C: D:\RecoveryTest /x /y:ZIP
Note: When you are prompted for confirmation to continue, enter Y to start the recovery operation. Also, if the process is taking too much time then you can press Ctrl + C to abort the operation instantly.

ALSO READ: 3 Easy Ways To Block Windows 10 Feature Updates From Downloading
Recover Deleted Files Using Windows Recovery Tool
We are going to use the above-mentioned syntaxes to recover deleted files using Windows Files Recovery tool. Before we get started with the process, one beneficial thing you can do to ensure a more successful file recovery is that, if you have deleted something, do not power off or restart your computer.
The more time you take to start the recovery process, the less likely you will be able to recover the lost data. That out of the way, here’s how to;
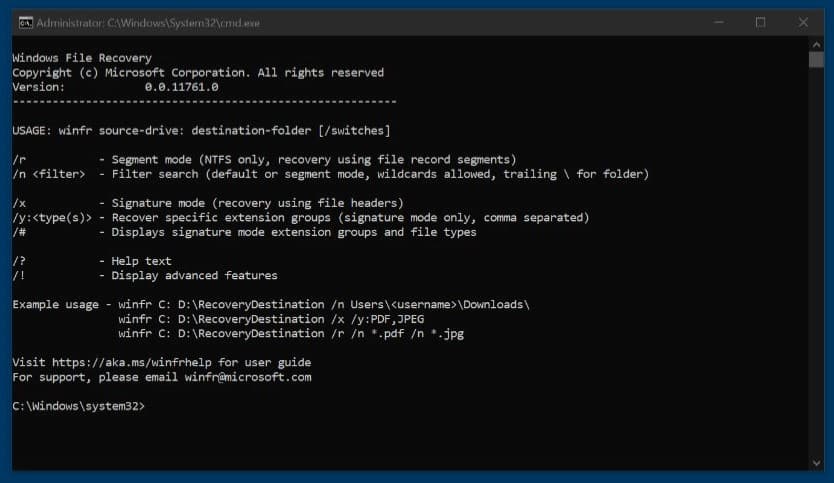
- Firstly, download Microsoft’s Windows File Recovery
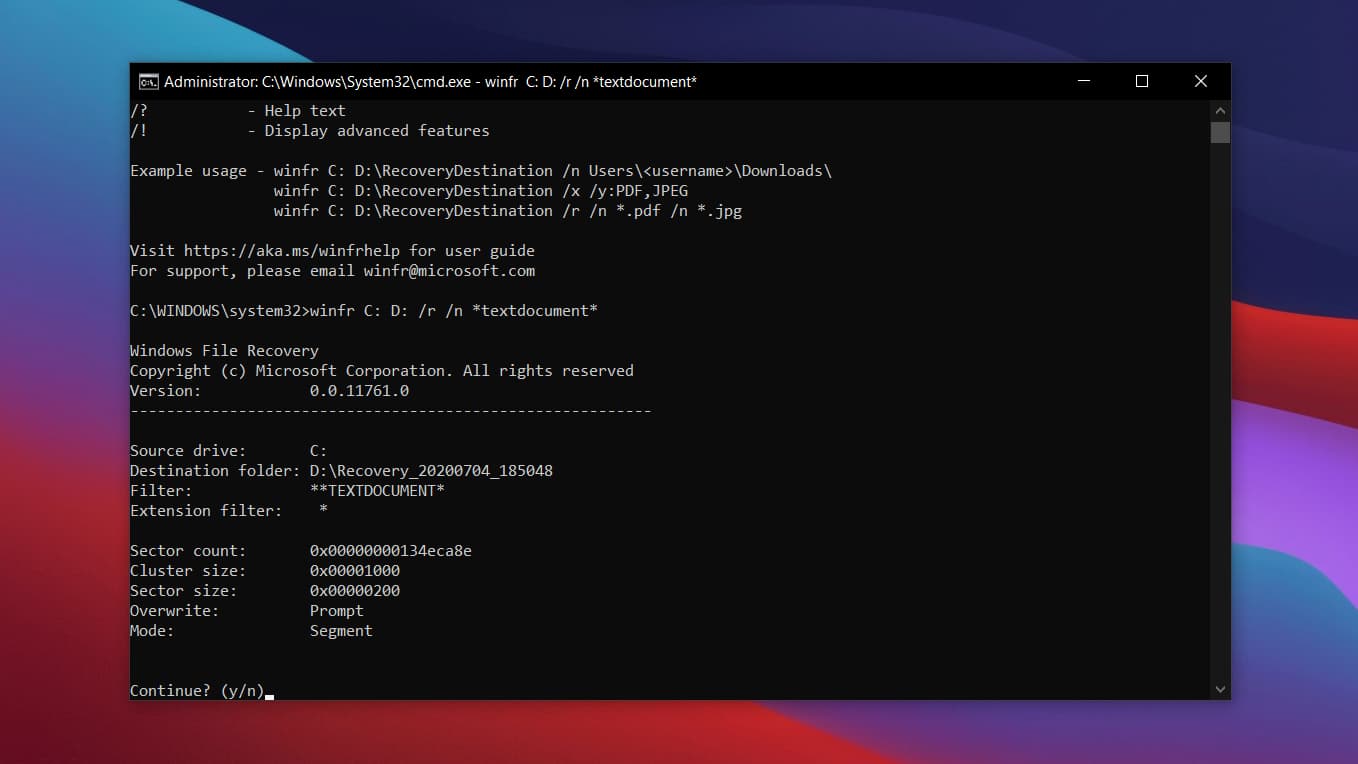
[appbox microsoftstore 9n26s50ln705] - Restore a specific file from your C: drive (textdocument.docx) to your D: drive. Do note, the source and destination drives (could be a USB drive too) have to be different for the file recovery to work.Now, Open Windows File Recovery, you will be welcomed with Command Prompt. Run
winfrand it will show you all command-line syntax of Windows File Recovery. - The simplest way to recover files is to use the below syntax.
winfr C: D:
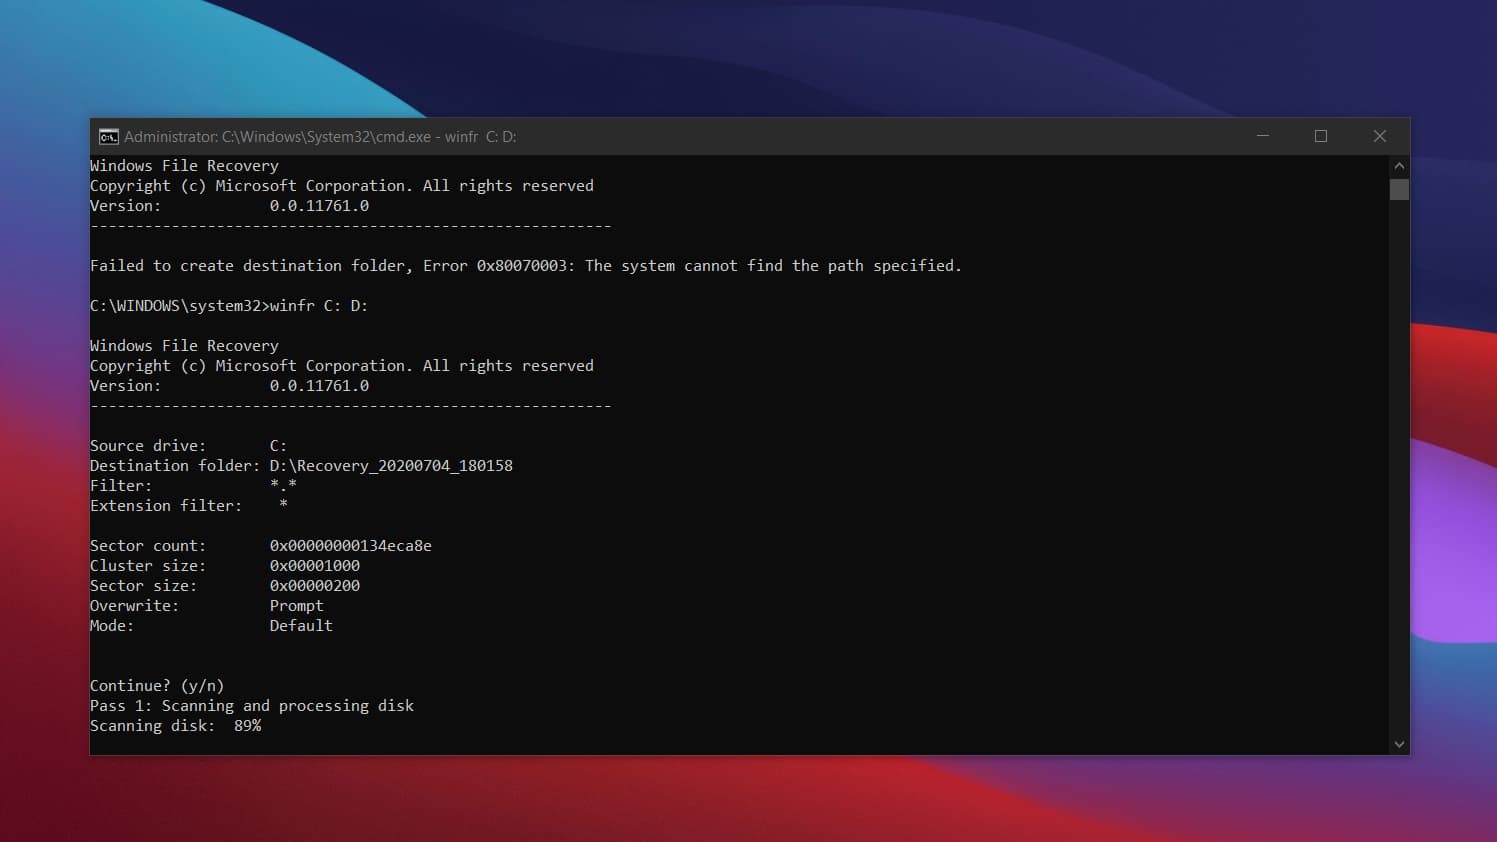
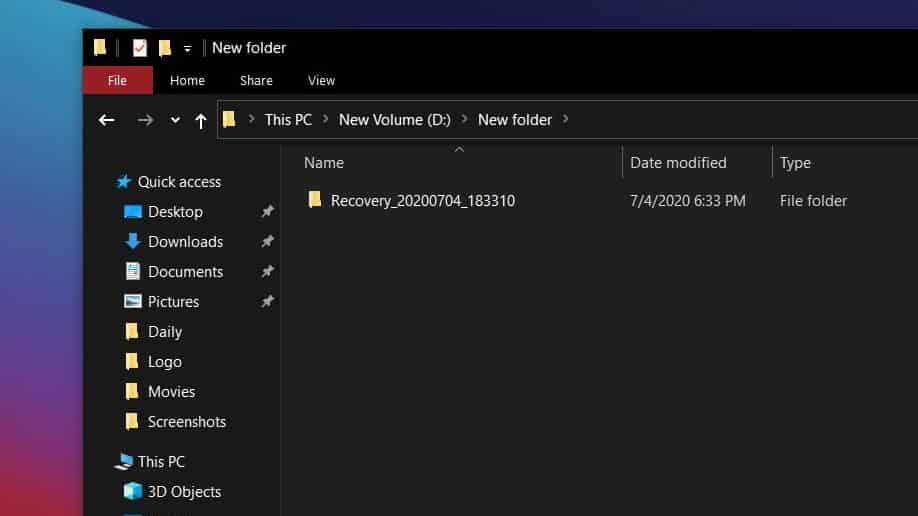
- Run the above command, you will be asked to press “Y” to continue the scanning process. Once you press “Y”, your files will be recovered and stored in a custom folder in D drive (Recovery_<date and time>).
- If you want to recover a particular file format, then follow the below syntax.• For PDF files:
winfr C: D: /r /n *.pdf
• For DOCX files:
winfr C: D: /r /n *.docx
• Same syntax for MP3, MP4, ZIP files:
winfr C: D: /r /n *.mp3 or winfr C: D: /r /n *.zip
- If you want to find a specific file based on its name, then follow the below syntax.
winfr C: D: /r /n *filename*
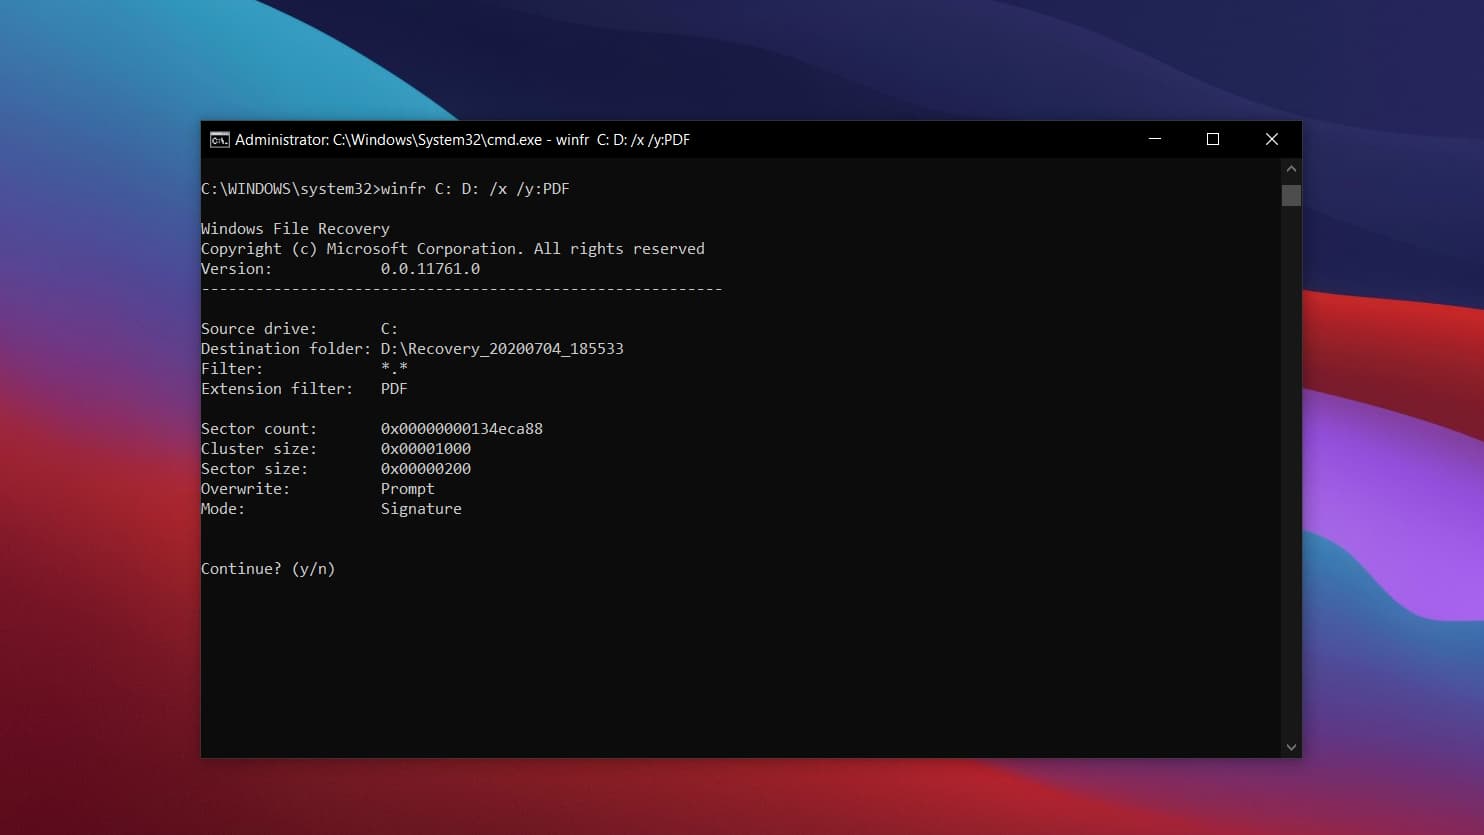
- If the /r and /n combination didn’t bring you satisfactory results, then you can use an advanced “Signature mode” to recover deleted files. You need to replace
/r /nwith/x /yfor deep scanning.winfr C: D: /x /y:PDF
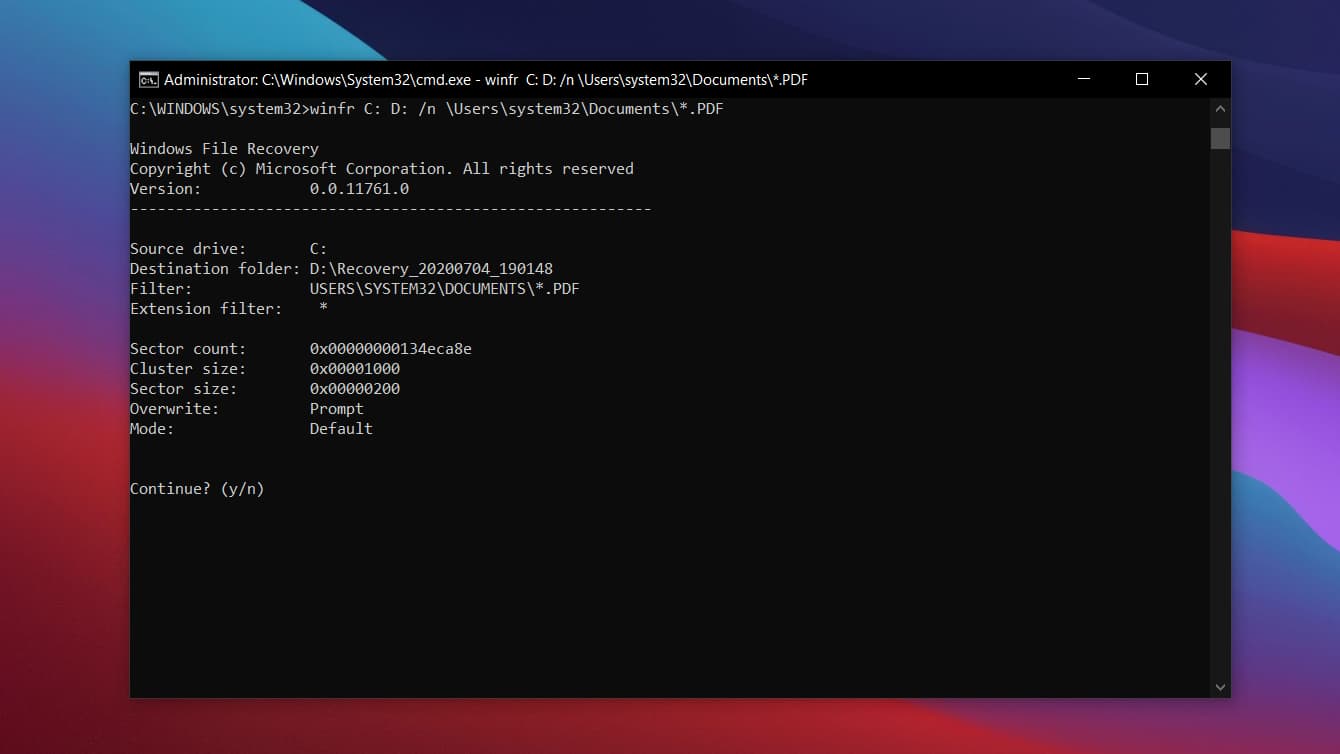
- In case, you want to scan a particular folder for deleted files then follow the below syntax.
winfr C: D: /n \Users\yourusername\Documents\
Note: Don’t forget the backslash (\) at the end of the folder.
- If you want to scan a particular file format in a specific folder, then below is the syntax to follow.
winfr C: D: /n \Users\yourusername\Documents\*.ZIP
So, this is how to recover deleted files using Windows File Recovery tool. Do let us know if you find it useful and if you have any queries, comment and let us know. Also, if you have any queries, do comment below or reach out to us on social media.

