Home Blog Page 4

Mivi Roam 2 Bluetooth Speaker Launched In India At Rs 1,199

Mivi, an electronic accessories brand launched its first Made in India product – Mivi Roam 2. This is the successor to the highly successful Mivi Roam 1.0. This is the first Bluetooth speaker that is fully Made in India, one step towards the Indian Prime Minister’s Vocal for Local and Aatma Nirbhar initiatives.

JOIN OUR TELEGRAM COMMUNITY ????

Mivi Roam 2: A ‘Made In India’ Bluetooth Speaker

The Mivi Roam is produced in India end to end i.e. from imagining it to designing it to building it, to fixing it, to testing it, and even boxing it right in our country. Apart from the fact that Mivi Roam 2 is Made in India, on the design front, the Roam 2 is made of an Aircraft-grade aluminum grill design.

Mivi Roam 2.0


The Roam 2 features a 5-watt speaker with a built-in mic for hands-free calling, giving out 24 hours of playtime at mid-volume with a battery of 2000mAh. According to the brand, the Roam 2 Bluetooth speaker produces an HD Stereo Sound and powerful bass that has been fine-tuned for the Indian audience’s music preference.

ALSO READ: boAt Stone 650R Wireless Bluetooth Speaker Review: No Disappointments!

In addition to that, the Roam 2 provides complete dust and water resistance and provides great connectivity, props to Bluetooth 5.0. The Mivi Roam 2 is available in 4 beautiful metallic colors and is priced at Rs.1,199, and is available at Mivi.in, Amazon and Flipkart.

BUY MIVI ROAM 2.0

Midhula Devbhaktuni, Co-Founder, Mivi, said;

Within a short span of time Mivi has become a most sought out brand in the Audio technology space. The market response and the success of our products have propelled us to take the plunge into the manufacturing space and we have set up a fully integrated manufacturing unit in India and soon we will be making all the products completely in India. We are sure that this product will become even bigger and successful than its predecessor Roam 1.0 and will soon become the most sought-after Bluetooth speaker.

5 Simple Steps To Build Your First Mobile Application
0

There are several simple steps to build your first mobile application. Applications are rapidly evolving to solve business problems and meet consumer needs. Accordingly, many app development platforms and coding tools are easily obtainable for internet users. With these resources, you can access everything you need to turn your app idea into a reality.

5 Simple Steps To Build An App

Not just resources, but you also need to know what steps to follow for a successful deployment. This is key to ensure your app design is user-friendly and functions properly. Well, we are here with simple steps to build your first mobile application.

Sketch Your App Concept

To build your mobile app, you first need to sketch your application concept. Ideally, you want to define your app’s purpose. Then, layout how you want it to work. You should identify any key features you imagine your app having as well. Categorize these features based on what is essential for your idea and what would supplement it well.

Planning: Build Your First Mobile Application

These priorities are helpful when you create your Minimum Viable Product (MVP). By focusing on these core elements, you can speed up the initial development process. Then, you can update the supplemental features once you’ve launched your application. Definitely, a concrete application concept sketch is crucial to develop your first application.

ALSO READ: How To Recover Deleted Files Using Windows File Recovery

Customize Your Design

Next, it is essential to customize your application design. Ideally, you want to come up with a UX design that is unique to your application. Often, this includes an application name, logo design, and color scheme plan. The background image you choose for your application is also important for user experience. This will be the first thing that users see when they view it in the app store.

Customize: Build Your First Mobile Application

In addition, you need to develop a system for organizing your app components and features. Notably, some application development platforms contain built-in template designs. Often, you can make simple changes to these layouts to make your app feel unique to your brand and sub-brands. Surely, when building your first mobile app, you need to customize your design.

Install A Container Registry

In addition, you should also install a container registry as you build your first application. A container registry is a repository that you can use to store your Docker images for Kubernetes and DevOps deployments. Essentially, container images are the files and components that make up your application. By storing them in one central location, you can access them easier.

Code: Build Your First Mobile Application

Additionally, you can scale your application rapidly by using containerization software. For instance, JFrog’s advanced container registry supports scalability with various on-prem, hybrid, and multi-cloud environments. Certainly, installing a container registry improves application file management and supports long-term scaling goals.

ALSO READ: How To Install WSL 2 On Windows 10: Goodbye Dual-Boot!

Code Your Application

Moreover, once you have the proper containerization software, you need to code your application. Without any prior coding experience, there are a few routes you can take to complete this step. For example, you can download an application development platform. Many of these resources often have free coding tutorials and online courses to get started.

Development: Build Your First Mobile Application

Another option is to partner with a programmer who can guide you along the way. If you choose this option, be sure that your programmer has a proven track record for developing successful applications. However, you choose to code your application, it is important to consider your coding language and mobile platform. Definitely, you need to code your application properly to ensure a successful app launch.

Conduct QA Testing

Furthermore, you need to conduct quality assurance (QA) testing before you can deploy your application. This is essential so that your app functions properly and is user-friendly. To get started testing your app, you should use an emulator or simulator. An emulator is an original device replacement that allows you to run applications on your device. Unfortunately, you cannot modify your apps while testing with this tool.

Testing: Build Your First Mobile Application

Alternatively, a simulator does not imitate mobile device hardware. However, you can use it to set up an analogous operating system. You should also conduct security testing to ensure your application data is well-protected before deployment. Of course, a thorough testing phase is a key to building your first mobile application.

ALSO READ: How To Remotely Control Linux From Windows [Step-By-Step]

There are several simple steps to build your first mobile application. First, you need to sketch your application concept. Next, customize your UX design with a logo and application background image. In addition, install a container registry to store your Docker images throughout the development process.

Moreover, code your application with a development platform or by partnering with a programmer. Furthermore, conduct in-depth QA testing before deploying your application to your device’s app store. Follow these simple steps to build your first mobile app.

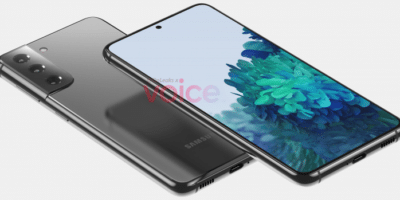
Samsung Galaxy S21 Series’ Detailed Specs Surfaced Online

Samsung’s upcoming flagship to hit market in a couple of months, but the leak-land already got us the detailed specification of the upcoming Samsung Galaxy S21 series. This leak comes after the renders that surfaced last month.

???? JOIN OUR TELEGRAM COMMUNITY

Samsung Galaxy S21 Series’ Detailed Specs

The latest leak on Galaxy S21 series reveals that both Galaxy S21 and S21+ will come with 6.2-inch and 6.7-inch FHD+ Infinity-O LTPS display with 120Hz referesh rate, respecitively, and the Galaxy S21+ Ultra will pack in a 6.8-inch Quad HD+ LTPO display with an adaptive refresh rate of upto 120Hz.

Samsung Galaxy S21

All the three are said to be powered by Snapdragon 875 SoC or Samsung’s own Exynos 2100, depending on the market. Coming to the camera front, the Galaxy S21 and Galaxy S21+ is speculated to pack in a 108MP + 12MP (UW) + 10MP (3x Telephoto) + 10MP (10x Periscope) cameras along with laser autofocus and up to 100x space zoom.

ALSO READ: Samsung S Voice: The Story Of A Dead Voice Assistant!

Adding some spice to the leak is a report that said that the Galaxy S21 Ultra will have support for S Pen stylus but it won’t come with a dedicated slot, instead the South Korean OEM is planning to sell cases for the phone to store the S Pen.

Samsung Galaxy S21, Galaxy S21+ and Galaxy S21 Ultra Specifications (Rumored)

Samsung Galaxy S21

  • S21 – 6.2-inch FHD+ Infinity-O LTPS Display, 120Hz refresh rate
  • S21+ – 6.7-inch FHD+ Infinity-O LTPS Display, 120Hz refresh rate
  • S21 Ultra – 6.8-inch Quad HD+ LTPO Dynamic AMOLED Display, 1-120Hz refresh rate, up to 1600 nits brightness, 3,000,000:1 contrast ratio
  • Octa-Core Qualcomm Snapdragon 875 Mobile Platform / Octa-Core Samsung Exynos 2100 processor
  • S21 and S21 +– 12MP rear camera with LED Flash, 12MP Ultra Wide sensor, 64MP Telephoto lens, 4K 60 fps, 8K 30fps
  • S21 Ultra – 108MP rear camera with LED Flash, OIS, 12MP Ultra Wide sensor, 10MP Telephoto lens for 3x zoom, 10MP Periscope lens for 10x zoom, 100x Space Zoom, Laser autofocus, 4K 60 fps, 8K 30fps
  • Android 11 with One UI 3.1
  • 4000mAh (S21) / 4800mAh (S21+) / 5000mAh (S21 Ultra) battery with fast charging both on wired and wireless (WPC and PMA)
  • 5G SA/NSA, 4G VoLTE, Wi-Fi 6 802.11ax (2.4/5GHz) / Wi-Fi 6E (S21 Ultra), Bluetooth 5.1, UWB (S21+ & S21 Ultra), GPS + GLONASS, USB 3.1, NFC, MST

All said, the Samsung Galaxy S21 is expected to come in Phantom Violet, Phantom Pink, Phantom Gray, and Phantom White colours, while, Galaxy S21+ is said to come in Phantom Silver, Phantom Black, and Phantom Violet and S21 Ultra in Phantom Silver and Phantom Black. The Galaxy S21 series should be introduced in a virtual unpacked event in January 2021.

How Much Ram Do I Have? Quick Way To Check

0

Every system uses a short-term memory that enables and powers the applications running on it. If your system is sluggish and you want to upgrade your system or you just an answer to this simple question “how much RAM do I have?” this piece will help (both for PC, Mac, and Linux).

???? JOIN OUR TELEGRAM COMMUNITY

There are various other factors, however, it is generally believed that the more the RAM, the more efficient the system will be. Before we jump on to explaining the step-by-step process of checking the RAM on your PC. You must know about RAM in particular.

What Is RAM?

RAM stands for “random access memory.” It is a physical working memory (volatile memory) that your system uses. All the open applications, files, and other data are stored here for quick access. Different from SSD or hard drive, RAM allocates memory space for programs when it is moved from your system storage.

How Much Ram

So, the more RAM you have, the more programs (ahem ahem! Chrome) can you run at once. If your system doesn’t have enough RAM, it will work slow or stutter and in some instances, it will stop and you will land up in low memory error.

ALSO READ: PCIe Vs SATA SSDs: Which Storage Drive Should You Buy?

How much RAM you need depends on what you do. You need more RAM for editing videos, playing the latest games, and so on. That being said, here’s how to see how much RAM is currently in your PC and whether you need to upgrade.

How Much Ram Do You Have?

1. On Windows

1.1. Windows 10 and 8

Here’s how to check the RAM on a system running Windows 10 or Windows 8;

  • Press the Windows key, type ram, and select the View RAM info option in the search results. Or, in Windows 10, open Settings (click the gear icon in the Start menu, or press Windows Key+I), click the System option, and select About in the left navigation menu.
    How Much Ram Do I Have on Windows 10
  • In the System Properties window, look for Installed memory (RAM) in Windows 8, or Installed RAM in Windows 10.
    How Much Ram Do I Have on Windows 10 (2)

1.2. Windows 7 and Vista

If you’re still using Windows 7, you’re running out of time before Microsoft officially ends support. Well, here’s how to check the RAM on Windows 7 or Windows Vista;

  1. Press the Windows key, type Properties, and then press Enter.
    How Much Ram Do I Have On Windows 7 and Windows Vista
  2. In the System Properties window, the Installed memory (RAM) entry displays the total amount of RAM installed on the computer.

ALSO READ: 7 Easy Ways to Remove Activate Windows Watermark

2. macOS

To check the total memory on a computer running macOS, here’s how;

  1. In the menu bar, click the Apple icon to open the Apple menu.
    How Much Ram Do I Have on MacOS
  2. In the Apple menu, select About this Mac.
    How Much Ram Do I Have on MacOS_1

The system overview is displayed, including the amount of RAM installed.

ALSO READ: 7 Best Free IDM Alternatives For Windows, Linux And Mac

3. Linux

Here’s how to check total RAM on a system running Linux, use the free or top commands.

  1. Open a terminal and run free -h to view memory stats, including total RAM and swap.
free -h

How Much Ram Do I Have on Linux

  1. Or, run top, and press m to display total and available memory.
top

How Much Ram Do I Have on Linux

So, these are some of the ways to check how much RAM do you have on your computer. Hope this piece answers “how much RAM do I have?.” There are varied ways, but the above-mentioned ways are some of the easiest ways to check.

Microsoft Announced Surface Laptop Go and New Surface Pro X

After much of leaks and rumors on the affordable Surface laptop, Microsoft finally announced two brand new Surface devices. One is the lightest, and most affordable laptop yet – Surface Laptop Go and the other is Surface Pro X with upgraded hardware for powerful output.

???? JOIN OUR TELEGRAM COMMUNITY

Microsoft Surface Laptop Go

The Surface Laptop Go packs in a 12.4-inch touchscreen PixelSense Display, (as mentioned earlier) it is backed by 10th Generation Intel Core i5 processor, coupled with 8GB (configurable up to 16GB) LPDDR4x RAM and paired with up to 256GB of SSD storage. It comes with a 720p video camera, and Studio Mics to handle video conferencing tasks.

In design terms, the laptop has a full-sized keyboard with 1.3mm key travel, has a large precision trackpad, and a fingerprint power button with One Touch sign-in through Windows Hello in some select models. The company promises up to 13 hours of battery life with fast charging support (80% charge in one hour).

ALSO READ: HP Pavilion Gaming 16 And OMEN 15 Gaming Laptops Announced

Microsoft Surface Laptop Go Specifications

Surface Laptop Go

  • 12.4-inch (1536 x 1024 pixels) PixelSense touchscreen display
  • 10th Gen Intel Core i5-1035G1 Processor
  • 4GB / 8GB LPDDR4X RAM
  • 64GB / 128GB / 256GB SSD
  • 720p HD f/2.0 aperture camera (front-facing) camera
  • Omnisonic Speakers with Dolby Audio; Dual far-field Studio Mics
  • Windows 10 Home in S Mode
  • One-Touch sign in with Fingerprint Reader Power button (Surface Laptop Go i5/4GB/64GB does not include Fingerprint Power Button)
  • Sensors: Ambient light sensor
  • Physical ports: 1 x USB-C, 1 x USB-A, 3.5 mm headphone jack, 1 x Surface Connect port
  • Connectivity: Wi-Fi 6 802.11ax, Bluetooth 5.0 LE
  • Up to 13 hours of battery life with typical device usage
  • Dimensions: 292.1 x 203 x 8.3 mm; Weight: 790g

ALSO READ: RAEGR AirShots 500 TWS Review: The Cheapest Best!

Microsoft Surface Laptop Go Pricing

Microsoft Surface Laptop Go comes in Ice Blue, Sandstone, and Platinum colors. You can pre-order it from Microsoft.com. The pricing;

  • 4GB RAM + 64GB (eMMC) – US$549.99 (~Rs. 40,285)
  • 8GB RAM + 128GB (SSD) – US$699.99 (~Rs. 51,275)
  • 8GB RAM + 256GB (SSD) – US$899.99 (~Rs. 65,925)

Microsoft Surface Pro X

The new Surface Pro X is backed by an SQ2 processor inside the tablet/laptop, which is likely a version of Qualcomm’s new Snapdragon 8cx Gen 2 5G processor without the 5G part, however, you get support for 4G LTE connectivity.

Other than that, the Surface Pro X features the same 13-inch PixelSense display from last year and two USB-C ports, and a Surface Connect port. It comes with 8GB or 16GB LPDDR4x RAM, paired with up to 512GB removable SSD options. It comes with 5MP front-facing camera with 1080p full HD video and a 10MP rear-facing autofocus camera with 1080p HD and 4k video.

Microsoft Surface Pro X

In addition to that, it features a Firmware TPM chip for enterprise security and BitLocker support, Enterprise-grade protection with Windows Hello face sign-in, and Windows Hello face authentication camera (front-facing). The company promises up to 15 hours of typical device usage.

Microsoft Surface Pro X accessories

Along with this, Microsoft also introduced new accessories for the Surface Pro X, including:

  • Microsoft Designer Compact Keyboard
  • Microsoft Number Pad
  • Microsoft 4K Wireless Display Adapter
  • Microsoft Bluetooth Ergonomic Mouse
  • Microsoft Modern Mobile Mouse

ALSO READ: Microsoft Surface Go 2 With 8th Gen Intel Core M3 Processor Announced

Microsoft Surface Pro X Specifications

Microsoft Surface Pro X

  • 13-inch (2880×1920 pixels) PixelSense touchscreen display
  • Microsoft SQ 2, Microsoft SQ 2 Adreno 690 GPU
  • 8GB or 16GB LPDDR4x RAM
  • 64GB / 128GB / 256GB SSD (Removable)
  • 5MP front-facing camera with 1080p full HD video
  • 10MP rear-facing autofocus camera with 1080p HD and 4k video
  • Windows Hello face authentication camera (front-facing)
  • Dual far-field Studio Mics, 2W stereo speakers with Dolby Audio sound
  • Windows 10 Home
  • Up to 15 hours of battery life with typical device usage
  • Physical ports: 2 x USB-C, 1 x Surface Connect port, Surface Keyboard port, 1 x nano-SIM, Compatible with Surface Dial off-screen interaction
  • Connectivity: Wi-Fi 5: 802.11ac compatible, Bluetooth 5.0, Qualcomm Snapdragon X24 LTE modem, Up to Gigabit LTE Advanced Pro3 with nanoSIM and eSIM support, Assisted GPS and GLONASS support
  • Sensor: Accelerometer, Gyroscope, Magnetometer, Ambient light sensor
  • Dimensions: 292.1 x 203 x 8.3 mm; Weight: 774g

Microsoft Surface Pro X Pricing

The Microsoft Surface Pro X is available for pre-order from today on Microsoft.com, starting at;

  • 16GB RAM + 256GB storage – US$1499.99 (~Rs. 1,09,778)
  • 16GB RAM + 512GB storage – US$1799.99 (~Rs. 1,31,800)

How To Insert A Line In Word [Quick Guide]

0

Lines are basic design elements that enhance reading. Typing characters to form a line to break up sections of a document is certainly time-consuming. Rather than using the keyboard to draw lines, you can insert a line in Word and format it in different ways to make it more appealing. You do need to know how to add a line in Word, if you don’t then here’s how to insert a line in word.

???? JOIN OUR TELEGRAM COMMUNITY

Use AutoFormat to Insert a Line In Word

The easiest and the quickest way to insert a line into a Word document is with the AutoFormat feature. To make use of it, place the cursor in the location that you would like to insert the line, type the desired characters for the variations of the standard horizontal line, then press Enter.

AutoFormat to Insert a Line In Word

To create varied style, press the associated keys on the keyboard:

  • Plain single line: Three hyphens (—)
  • Plain double line: Three equal signs (===)
  • Broken or dotted line: Three asterisks (***)
  • Triple line with a thick center: Three number signs (###)
  • Wavy line: Three tildes (~~~)
  • Bold single line: Three underline symbols (___)

ALSO READ: 7 Easy Ways to Remove Activate Windows Watermark

Use the Horizontal Line Tool to Insert a Line in Word

If you don’t want to follow the common stride, Microsoft Word gives you an option to insert a line into Word document using the built-in Horizontal Line tool. Here’s how to;

  1. Place the cursor where you want to insert a line.

  2. Go to the Home tab (by default, the Home tab is selected when you open a new or existing Word document).
    Use the Horizontal Line Tool to Insert a Line in Word

  3. In the Paragraph group, select the Borders drop-down arrow and choose Horizontal Line.
    Use the Horizontal Line Tool to Insert a Line in Word
  4. To change the look of the line, double-click the line in the document.
    Use the Horizontal Line Tool to Insert a Line in Word
  5. In the Format Horizontal Line dialog box, modify the width, height, color, and alignment of the line.

Use Borders to Insert a Line in Word

Other than the Horizontal Line tool, you can use the Borders option in the Paragraph group, which gives you another way to insert a top or bottom border that resembles a horizontal line in the document.

  1. Click on the paragraph of text where you want the line to appear.
  2. Got to Home and the Paragraph group. Click on the Border button. The Bottom border is usually the default. This places a line below the text you have selected on the page or the paragraph if you haven’t selected any text.
    Use Borders to Insert a Line in Word
  3. For other options (like a vertical border), you can click on the tiny dropdown arrow on the Borders button to access a list of options.
    Use Borders to Insert a Line in Word
  4. To change the look of any border, click on Borders and Shading. Use the dialog to adjust the style, color, and width of the border.

ALSO READ: 3 Ways To Easily Combine PDF Files For Free

Use the Shapes Menu to Insert a Line in Word

A fourth way to add a line to a Word document is to draw it on the page. The Shapes menu contains several line options, which include lines with arrow points on one or both ends. After you draw the line, you can also customize the color and appearance.

  1. Place the cursor in the spot where you want to insert a line.

  2. Go to the Insert tab.
    Use the Shapes Menu to Insert a Line in Word

  3. In the Illustrations group, select the Shapes drop-down arrow.
    Use the Shapes Menu to Insert a Line in Word

  4. In the Lines group, choose a-line shape.Use the Shapes Menu to Insert a Line in Word

  5. In the Word document, drag across the location where you want the line to appear.

  6. To change the look of the line, select the line to enable the Shape Format tab. [Some versions of Word call this Format.]
    Use the Shapes Menu to Insert a Line in Word

  7. Go to the Shape Format tab and change the color, use a different line style, or apply effects.

Adding lines at the right places can lead the eyes to the most important part of the document. Well, AutoFormat and Horizontal lines are a more obvious and common way to insert a line in Word. But adding Borders at the right place can boost the visual appeal of your content.

Xiaomi Mi Smart Band 5 with 24-hour Sleep Tracking Launched in India

Xiaomi launched its latest smart band – Mi Band 5 in India. The main highlight of this band is its 20% bigger AMOLED color touch screen display than its predecessor featuring more characters and features customized band faces. Other than that, it has 11 sports mode and you can take it for swimming.

???? JOIN OUR TELEGRAM COMMUNITY

Xiaomi Mi Band 5: The Latest Addition!

The Mi Band 5 has a 1.1-inch AMOLED color touch screen display, comes with 11 sports modes along with 5ATM water-resistant, which you can take it for swimming under 50 meters. The Mi Smart Band 5 adds stress monitoring, breathing training, PAI (Personal Activity Intelligence).

Mi Smart Band 5

With the launch of Mi Smart Band 5, Xiaomi has finally enabled 24-hour sleep monitoring with a 40% improvement in accuracy, including quick naps, REM deep sleep, irregular and sporadic sleep patterns, and rapid eye movement monitoring features.

ALSO READ: Best Smartwatches Under Rs 3000 [2020]

In other features, the Smart Band 5 packs in a women’s health tracking such as the menstrual cycle. The Mi Band 5 promises up to two weeks of battery life with normal use and three weeks with long battery mode and comes with a new magnetic charging cable.

Xiaomi Mi Smart Band 5 Specifications

Mi Smart Band 5

  • 1.1-inch (126 x 294 pixels) AMOLED 24bit color touch screen display with up to ≥450 nits brightness, 2.5D scratch-resistant glass, AF coating
  • Shows time, steps, heart rate, activities, weather forecast, notifications from apps, calls, and more
  • Music control, Camera control
  • Photoplethysmography (PPG) / Heart rate sensor
  • 24-hour sleep tracking, automatic activity detection, Sedentary reminder
  • 11 sports modes (outdoor running, walking, cycling, indoor running, swimming, exercise, indoor cycling, elliptical machine, skipping rope, yoga, rowing machine)
  • PAI health analysis, Women’s health tracking: Menstrual cycle,
  • Tri-axis Accelerometer + Tri-axis Gyro, Capacitive Wear Monitoring Sensor, Pressure assessment, Breathing training, Remote shutter control
  • 5ATM (50 meters) water-resistant
  • Bluetooth 5.0 LE
  • 125mAh battery with up to 14 days of battery life in typical mode, 20 days in long battery mode
  • Dimensions: 47.2 x 18.5 x 12.4mm; Weight: 11.9g

The Xiaomi Mi Smart Band 5 comes in Black color and is priced at Rs 2,499. It will be available from Amazon.in, Mi.com starting from October 1st at 12 PM. It will sell straps in Black, Navy Blue, Teal, Purple, and Orange colors.

BUY XIAOMI MI BAND 5

POCO X3 With Snapdragon 732G, 6000mAh Battery Launched in India

0

POCO launched its latest mid-range smartphone POCO X3. This smartphone is the newest in the X series and the successor to the popular POCO X2, which got launched early this year. The main highlight of this smartphone is its 120Hz display, powerpack mid-range internals, and 6000mAh battery with 33W fast charging support.

???? JOIN OUR TELEGRAM COMMUNITY

POCO X3: The Successor to POCO X2

The POCO X3 packs in a 6.67-inch Full HD+ LCD screen with 3.8mm punch-hole screen that houses a 20-megapixel camera, 120Hz refresh rate with Dynamic switching between 120Hz, 90Hz, 60Hz, or 50Hz, and has 240Hz touch sampling rate. It is powered by Snapdragon 732G SoC with liquid cooling, coupled with up to 8GB RAM, and paired with up to 128GB (UFS 2.1) storage, expandable memory up to 256GB.

POCO X3

The X3 packs come with Z-Shocker Haptics with over 150 vibration modes for different scenarios, packs Sony IMX682 64-megapixel 1/1.7″ sensor, 13-megapixel ultra-wide-angle lens, 2-megapixel 4cm super macro, and a 2-megapixel camera for portrait shots. Other than that, the phone has a side-mounted fingerprint scanner, runs on Android 10 with MIUI 12 on top, and is backed by a 6000mAh battery with 33W fast charging.


ALSO READ: Why I “Settled” on the Redmi K20 Pro over OnePlus Nord and Why You Should Too

POCO X3 Specifications

POCO X3

  • 6.67-inch (1080 × 2400 pixels) Full HD+ 20:9 LCD screen with 120Hz refresh rate, HDR10, Corning Gorilla 5 protection
  • Octa-Core (2.3GHz Dual + 1.8GHz Hexa Kryo 470 CPUs) Snapdragon 732G 8nm Mobile Platform
  • Adreno 618 GPU
  • 6GB / 8GB LPDDR4X RAM
  • 64GB or 128GB (UFS 2.1) / 128GB (UFS 2.1) storage, + expandable via microSD (up to 256GB)
  • 64MP rear camera with LED Flash, Sony IMX682 sensor, f/1.89 aperture, 13MP 119° ultra-wide sensor with 1.12μm, f/2.2 aperture, 2MP depth, and 2MP 4cm macro sensor with 1.75μm, f/2.4 aperture
  • 20MP front-facing camera with f/2.2 aperture
  • Android 10 with MIUI 12
  • 6000mAh battery with 33W fast charging
  • Side-mounted fingerprint sensor, IR sensor, Splash resistant (IP53)
  • Hybrid Dual SIM (nano + nano / microSD)
  • 3.5mm audio jack, Stereo speakers, Hi-Res audio, aptX HD
  • Dual 4G VoLTE, Wi-Fi 802.11 ac 2 x 2 MIMO, VoWiFi, Bluetooth 5, GPS/GLONASS/Beidou, USB Type-C
  • Dimensions: 165.3×76.8×10.08mm; Weight:225g

ALSO READ: RAEGR AirShots 500 TWS Review: The Cheapest Best!

POCO X3 Pricing

The POCO X3 comes in Shadow Gray and Cobalt Blue colors. It will go on sale on Flipkart starting from September 29th. It comes with an anti-bacterial case and a screen protector in the box. It is priced;

  • 6GB RAM with 64GB storage version – Rs. 16,999
  • 8GB RAM with 128GB storage – Rs. 18,499
  • 8GB RAM with 128GB storage – Rs. 19,999

???? BUY POCO X3

RAEGR AirShots 500 TWS Review: The Cheapest Best!

0

RAEGR, a mobile accessories brand launched its new wireless TWS earphones; RAEGR AirShots 500 TWS earbuds. The company has sent us the product to test and review, and here’s our comprehensive review after using it for well over a month.

JOIN OUR TELEGRAM COMMUNITY ????

RAEGR AirShots 500 TWS Review

Box Content

  • RAEGR AirShots 500 TWS earbuds
  • Charging case
  • MicroUSB cable (for charging)
  • User guide

Design & Build

The charging case is the first thing you will notice when you unbox. It is built really elegantly very much compact and not at all look bulky in hand. The case has a fillet rectangle shape with RAEGR branding carved with silver in the middle of the case. There are magnets in the case which guide the earphones to get into their slots perfectly.

RAEGR AirShots 500 TWS Review


Inside, the case also showcases the battery percentage in digital form which looks super cool and quite futuristic. The charging case has 1 input port and 1 output port. In addition, the case has a 1500 mAh battery that can be used to charge your phone when you need some additional juice in an emergency. That said, it has an overall smooth finish and design. The charging case can be used as a power bank and acts as a mobile stand too.

ALSO READ: [Giveaway Ended] Realme Buds 2 Review: Budget Earphones Done Right!

Talking about the earphone itself, it feels smooth and shiny and has beautiful curves. It has a secure fit, which can be used walking, however, it comes out when you running and working out. After use, you can just place them in the charging case and they get automatically switched OFF and start charging.

Each earbud has one button embedded on them for multiple functionalities. The buttons given on the earbuds are tactile and have a satisfying click to them. You can easily control the music using these action buttons.

Music Controls:

  • Play/Pause Track – Click Left/Right action button once
  • Volume Down – Click Left earphone action button 3 times
  • Volume Up – Click Right earphone action button 3 times
  • Previous Track – Click Left earphone action button 2 times
  • Next Track – Click Right earphone action button 2 times
  • For Accessing Assistant: Long press Left/Right earphone action 1-2 seconds

Call Controls:

  • Answer Incoming Call / End the ongoing call – Click Right earphone action button
  • Reject Incoming Call – Long press the right earphone action button for 1-2 seconds
  • Last Called Number (Redial): Click Left/Right earphone action button three times

Sound Quality

The pairing process of this earphone is no complication; in fact, it is pretty nimble, thanks to the Bluetooth v5 that provides a stable connection. The signal strength and range of the headset was good. As with any headphone, the most important thing to consider is how the headphones sound, and thankfully, these headphones sounded pretty good.

RAEGR AirShots 500 TWS Review

The earphones, the two kidney-shaped earbuds fit perfectly in the ears. The earphone has noticeably clear vocals and is bass-oriented. for the most part). The lows were subtle, while mid-range is quite distinct with a slight bit of mid boost, which is pretty standard among budget headphones. Speaking of highs, it wasn’t awe-inspiring and performed like a charm.

ALSO READ: OPPO Enco M31 Review: Best Wireless Earphone Under Rs.2500

The treble was clear clean, however, the bass is punchy. The noise isolation is good for the daily commute, also help distinguish background instruments. As this earbud features IPX7 water and sweat resistance, you can use it for outdoor activities. Overall, in terms of sound quality, the AirShots 500 TWS earbud is good to go.

Battery

The noise isolation is good for the daily commute, and speaking of battery, the earbuds offer 3 hours of playtime with full volume and 4.5 hours of playtime with 70% volume, which is nice. The charging case takes around 4 hours to charge up to 100%, whereas earbuds take around 1 hour for charging completely.

RAEGR AirShots 500 TWS Review

With the case, users can expect around 50 hours of total playtime and can recharge up to 12 times, which is really great considering how lightweight it is. If you don’t charge your mobile phone, then, you can charge your earbuds up to 12 times giving a battery life of whopping 50 hours.

PROS

  • Lightweight
  • Good vocals
  • IPX7 waterproof rating
  • Charging case acts as a power bank
  • The battery life of 4-5 hours on a single charge
  • Multiple functionalities from dedicated buttons

CONS

  • Falls off easily during a workout
  • The charging case takes 4 hours to charge

Verdict

We have tested RAEGR AirShots 500 TWS earbuds for well over two weeks, so the conclusion is appropriate. RAEGR AirShots 500 TWS earbud is priced at Rs 1,990 (at the time of writing), and for this pricing, the build and the sound quality are pretty good. Overall, it’s one hell of a deal. RAEGR comes with 1 Year Limited Warranty against manufacturing defects only. 

BUY RAEGR AIRSHOTS 500 TWS

RAEGR AirDrums 400 TWS Review: The Powerpack Cubes!

0

RAEGR, a mobile accessory brand launched its new TWS speaker, dubbed as RAEGR AirDrums 400 TWS. The company has sent us the product to test and review, and here’s our comprehensive review after using it for well over a month.

JOIN OUR TELEGRAM COMMUNITY ????

RAEGR AirDrums 400 TWS Review

Box Content

The unboxing experience was quite okayish, not much to talk about.

  • RAEGR AirDrums 400 TWS speakers (3W x 3W)
  • 2 x MicroUSB cable (for charging) 
  • 2 x lanyard
  • User guide

Design & Build

The design of the speaker is quite minimalistic and simple, however, the build quality is quite solid, while being pretty light-weighted. The speakers are in a boxy shape with the rounded edges, which allow for them to be stored efficiently in a bag or even inside your pocket.

RAEGR AirDrums 400 TWS Review

There’s a thick rubber underside the speaker that houses the buttons panel. The rubber material is of top-notch, which is placed to keep your music flow without surface vibration. Speaking of buttons, it is clean and clicky. Each speaker has two buttons; one for powering it on and the other is for the microphone.

Controls

The controls are pretty adequate, simple, and straightforward. Nothing super detailed or flexible, but it’s fine.

For Music:

  • Click the Power button once — Play/Pause track
  • Long-press the Power button (1-2 seconds) — Power On/Off

For Calls:

  • Click the Microphone button once — Answer the incoming call
  • Click the Microphone button once — End ongoing call
  • Click the Microphone button twice — Redial last dialed phone number

Audio Quality

With Bluetooth v5.0, the pairing process is smooth. If you have a single unit of these speakers, there’s nothing more to know about the connectivity here. However, if you want to pair two speakers to establish a stereo system, then its process is no hassle. Turn on the other speaker and that’s it, no human interference is needed.

RAEGR AirDrums 400 TWS Review

Irrespective of the size, the speaker made up for a great sounding speaker with the right amount of bass. This speaker produced balanced stereo sounds. The highs were good, the mids were okayish or rather balanced and the lows were crisp.

ALSO READ: Stuffcool Theo Review: Don’t Be Fooled By The Size!

We weren’t expecting this speaker to go high in its volume (by looking at its size), but we were wrong. This speaker can go very loud without disrupting much of the sound quality. Compared to other Bluetooth speakers of this size, AirDrums 400 gives out great sounding audio and the overall experience with the speaker is outstanding.

Battery

RAEGR AirDrums 400 TWS Review

The RAEGR AirDrums 400 TWS comes with a 520mAh battery, which gives you around 8-9 hours of playtime (at 70% volume) and 2.5 hours of playtime (at 100% volume). Not just that, it charges pretty quick. It took 1.5 hours to charge fully from 0% to 100%, which is great considering the amount of time it stays on to spill out its performance.

Verdict

RAEGR AirDrums 400 TWS Review

We have tested RAEGR AirDrums 400 TWS speakers for well over two weeks, so the conclusion is appropriate. RAEGR AirDrums 400 TWS Bluetooth speaker is priced at Rs 1,500 (at the time of writing), and for this pricing, the build and the sound quality are pretty good. We totally recommend this.

BUY RAEGR AIRDRUMS 400