Emails in our inbox come with a lot more information than what you see in an email. This information can “sometimes” help us trace the email to see its origin. Why would I want to trace an email, you ask? Malicious and spam emails are becoming increasingly common these days, and if you can trace an email, you can know where it is from and how genuine it is.
How To Trace An Email Address
The only way to trace an email is by looking at the email header. The Email header contains email’s metadata and routing information that no one cares about.
Most of the email clients don’t bother about displaying metadata because it is full of technical details about which an average user doesn’t care. However, they do offer a way of checking the header, and it’s quite simple.
Trace An Email From Gmail
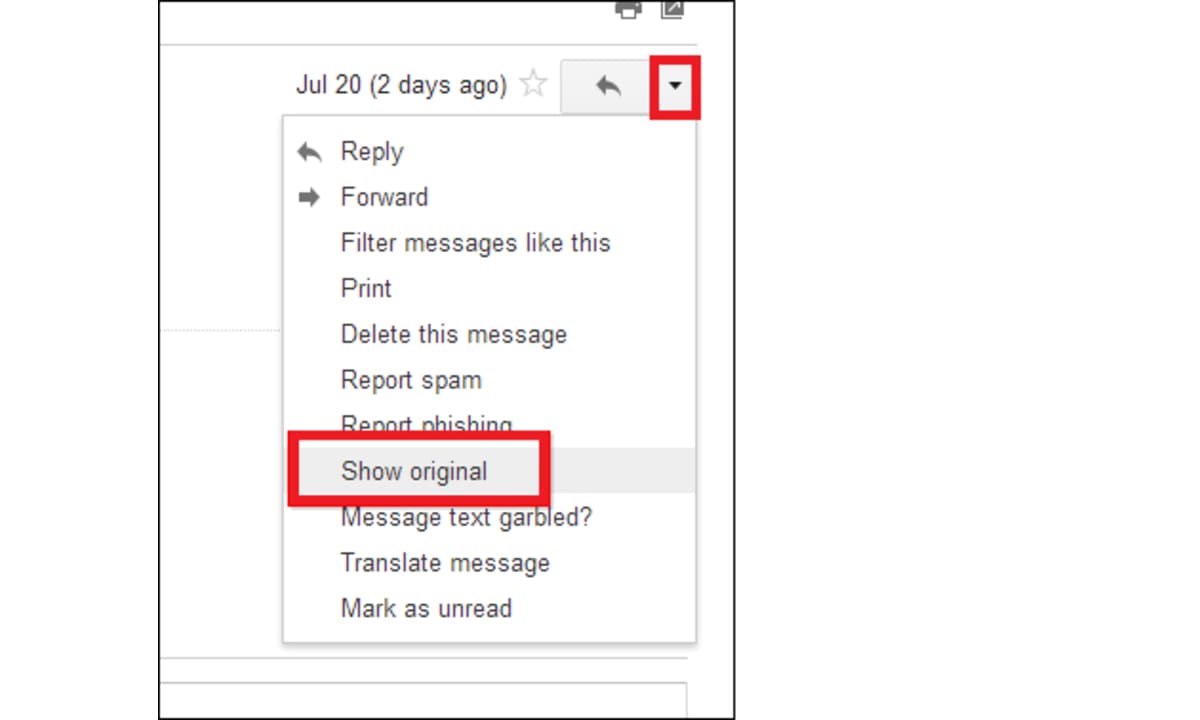
Open the email that you want to trace. In the top right corner of the email, select the three-dot menu, from the options that appear click on Show Original.
Trace An Email From Outlook
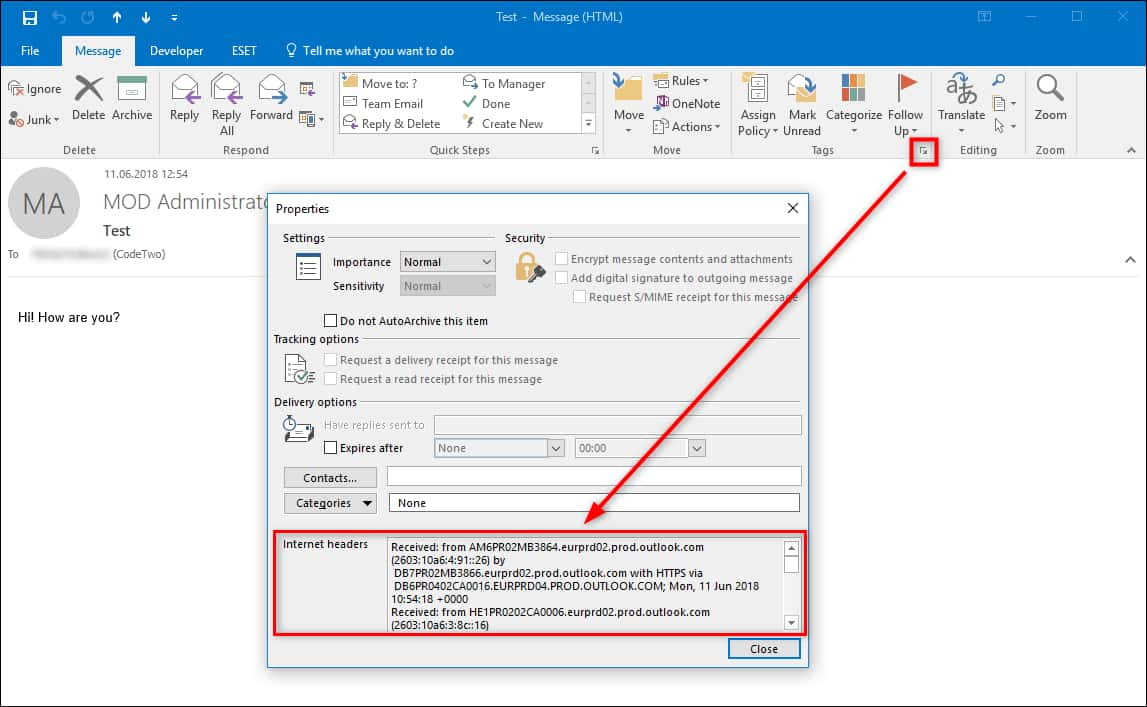
Go to the email that you want to trace. Then click on File > Properties. You’ll find the information in the Internet Headers section.
Trace An Email From Apple Mail
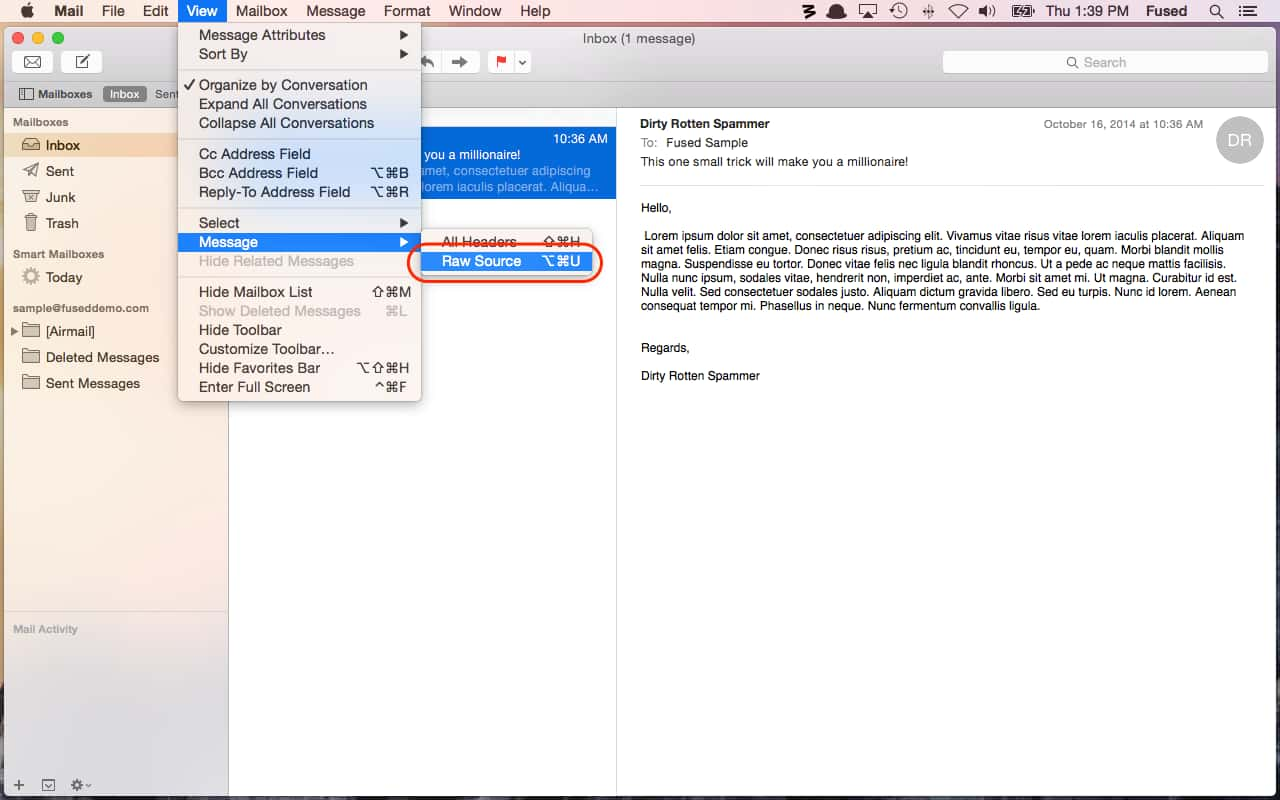
Open the email you wish to trace, then head to View > Message > Raw Source.
Now, there are immaculate numbers of email clients, and if yours is not mentioned above, a quick Google search might be helpful. Once you get into the metadata, unless you’re a CS graduate, everything that you look at will be gibberish.
ALSO READ: Here Is How To Schedule An Email In Gmail With Ease [Step-By-Step]
Determine Data In An Email Header
There will be some information that we don’t care about. Read the header in chronological order from the bottom to the top. Each new server the email travels through adds “Received” to the header.
What Does Each Line Represent?
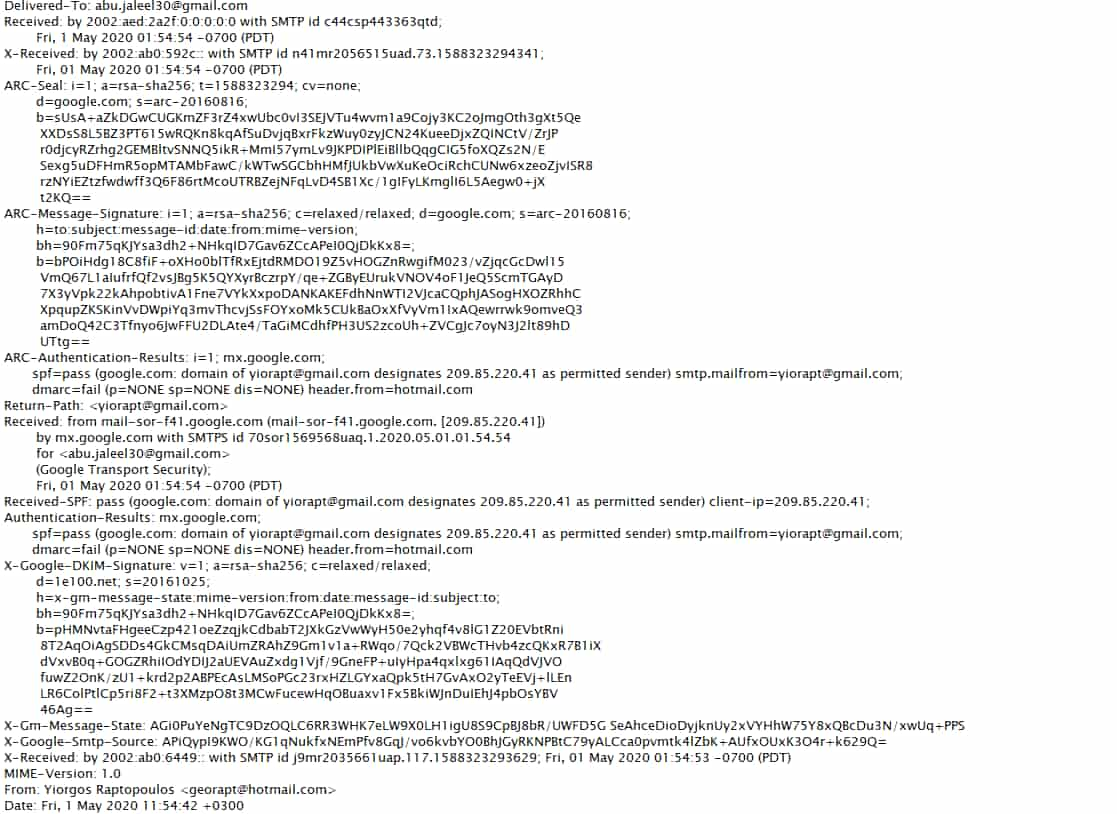
- Reply-To: The email address you send your response to.
- From: Displays the message sender.
- Content-type: Tells the browser how to interpret by specifying if the character sets are UTF-8 or ISO-8859-1.
- MIME-Version: MIME is an email format version. The current version is MIME-1
- Subject: The subject of the email.
- To: The recipients you want to send the email to; by entering the email address.
- DKIM-Signature: DKIM stands for Domain Keys Identified Mail. It authenticates the domain the email was sent from and protects against email spoofing and sender fraud.
- Received: The email travels through many servers before you receive it in your inbox and receive lists of all the servers. Received lines should be read from bottom to top as the bottom-most line is the originator.
- Authentication-Results: Contains a record of the authentication checks carried out.
- Received-SPF: SPF stands for Sender Policy Framework, which forms part of the email authentication process that stops sender address forgery.
- Return-Path: The location where non-send or bounce messages end up.
- ARC-Authentication-Results: The authenticated received chain is another authentication standard that verifies the identities of the email intermediaries and servers that forward your message to its final destination.
- ARC-Message-Signature: The signature takes a snapshot of the message header information for validation, similar to DKIM.
- ARC-Seal: “Seals” the ARC authentication results and the message signature, verifying their contents, similar to DKIM.
- X-Received: Differs to “Received” in that it is considered non-standard; that is to say, it might not be a permanent address, such as a mail transfer agent or Gmail SMTP server. (See below.)
- X-Google-Smtp-Source: Shows the email transferring using a Gmail SMTP server.
- Delivered-To: The final recipient of the email.
Of course, learning everything about the above terms would be quite tricky. We don’t need everything mentioned above.
ALSO READ: Here’s How To Undo Send An Email In Gmail; Escape The Regrets!
Tracing The Email’s Original Sender
To trace, we need the IP address of the sender, which you can find in the Received section and sometimes in X-Originating-IP or Original-IP.
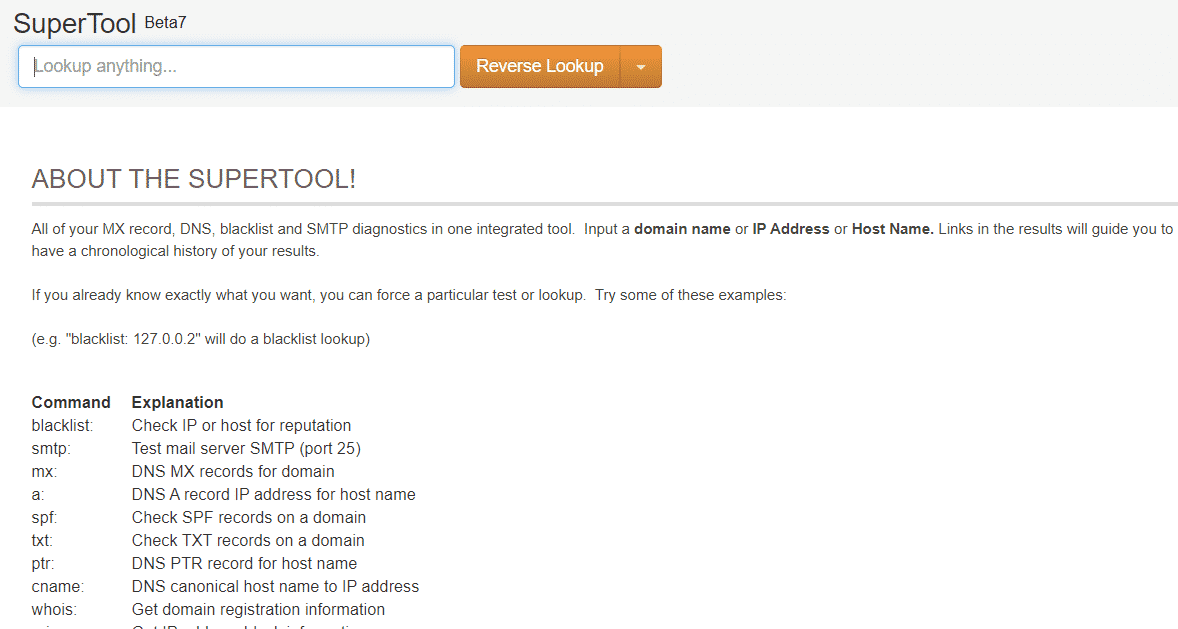
Then head to MX Toolbox, enter the IP address in the box, and change the search type to Reverse Lookup using the drop-down menu. Then, hit Enter. The search results will display a lot of information related to the sending server.
Mind you, if the IP address that you’re dealing with is private, the tool will not work. There are millions of private IP addresses in the world, and it is essential to know which ones are.
- 0.0.0-10.255.255.255
- 16.00-172.31.255.255
- 168.0.0-192.168.255.255
- 0.0.0-239.255.255.255
The above addresses are considered to be private IP addresses and will not return any results. In instances like spammers spamming your inbox, tracing could prove to be useful. However, we suggest you take the information from the headers with a pinch of salt as they’re not always accurate.
So, this how you can track an email to its source IP address. We hope this article was useful for you if it was, do share with those who might benefit from this. In the fast-moving world, how do you tackle spam emails? Let us know in the comments section below.

